JWT Custom authentication Tutorial
Introduction
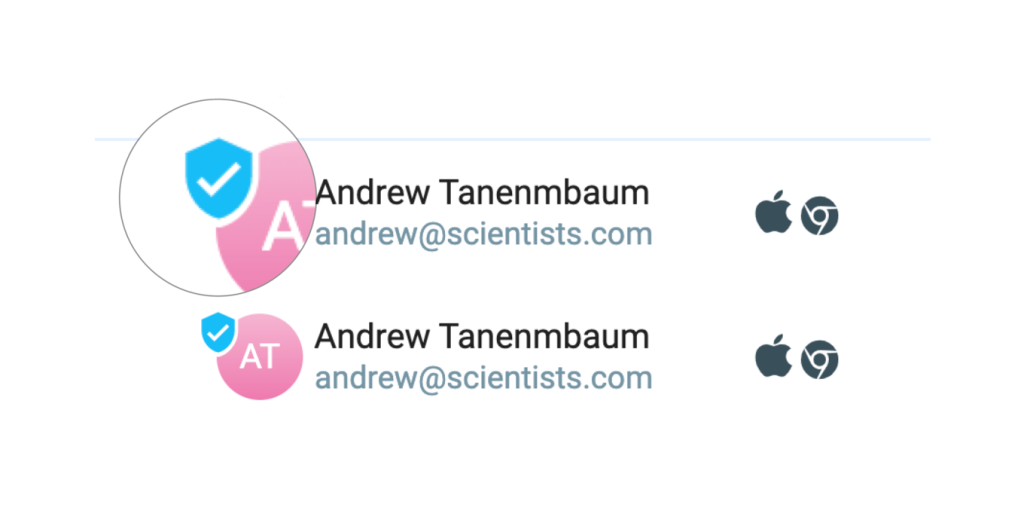
The Tiledesk Web Widget provides a default anonymous identity to his users. This means that the first time the widget starts on the end-user's browser it will assign to the user a unique, random user-id, that will last until the browser cache is cleared. This temporary, random identity provides many benefits, first of all the option to immediatily install and use the widget on your web site or application, without any configuration.
While "anonymous authentication" mode provides immediate and easy deployment of the Tiledesk widget, sometimes you would like to give your Tiledesk end-users a persistent, recognizable identity.
This is especially true when, for example, your end-users already have a certified identity into some other company's Identity Provider.
Tiledesk provides the option to authenticate your end-users with a custom, certified identity, using "custom JWT authentication", a very easy and market proved authentication technology.
In this tutorial we'll provide you a complete example on how you can successfully setup a custom JWT authentication for your Web Widget end-users. Let's start!
The tutorial's application
We developed a fully working application (client + server code) already deployed at the following http address:
custom-authentication-example.html on replit
This application will provide you a fully understanding of the necessary configuration to setup custom authentication for your Tiledesk Project.
To understand how the application works and what does it mean to have a unique, certified identity, let's run a little test.
Just open the url and the page's embedded widget, then start a new conversation. Now send a simple message (i.e. "test"), as in the figure:
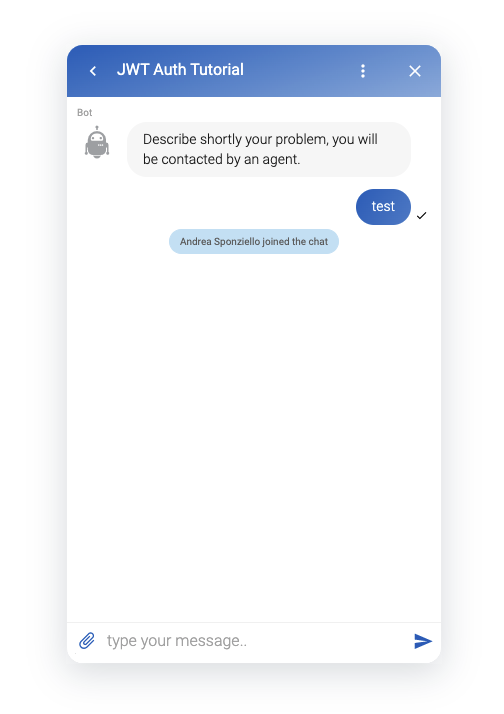
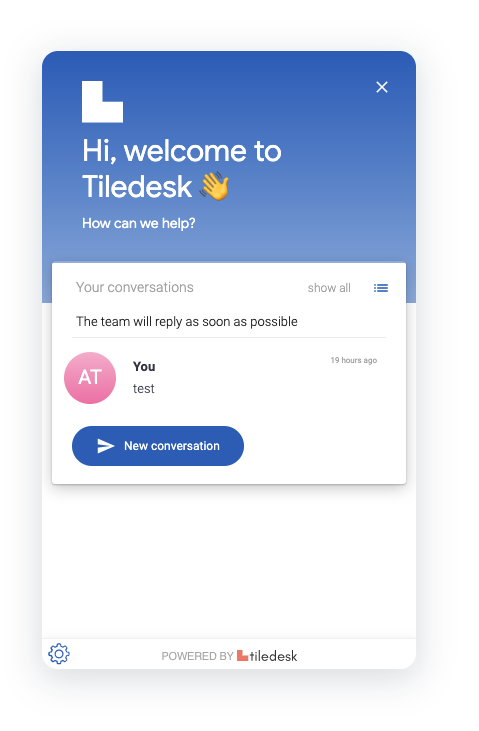
The user's conversation history is always saved on the Tiledesk servers on a per-user-id base and visible in the widget's home. With anonymous users, when you open this same page's url in a different browser after the first conversation (if you first opened the page in Chrome try opening it again in Firefox or Safari), the conversation history is not "conserved" between different sessions on different browsers because the user is, by default, anonymous, and a new one is created for each browser session (the user anonymous identity is anyway maintained on the same browser instance until your browser's cache is cleared).
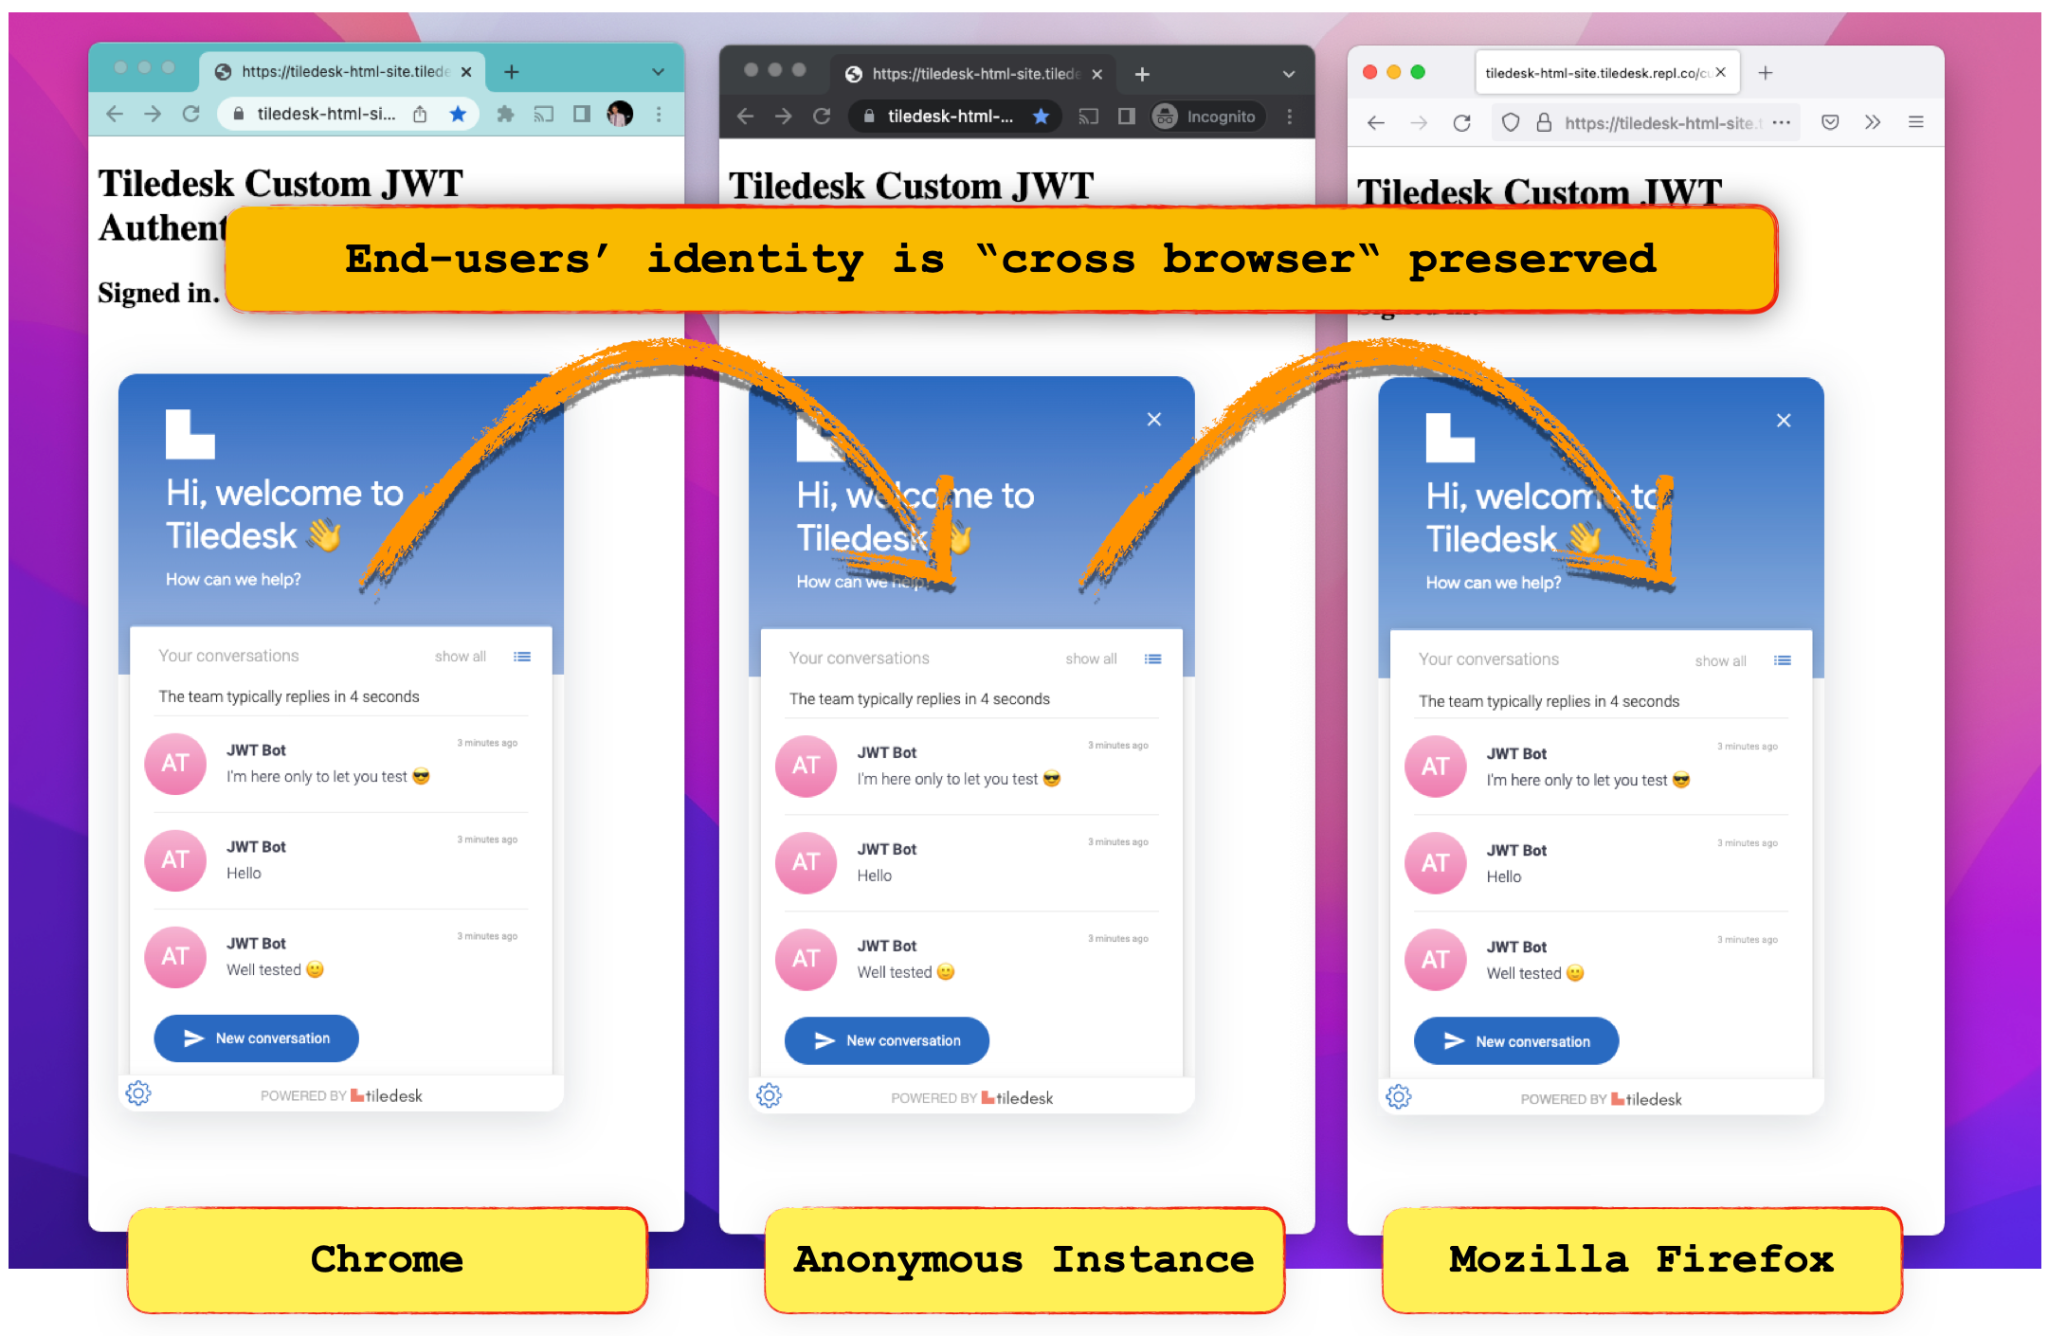
If you run our app in different browsers (of you open anonymous windows of the same browser) you will instead magically see that the conversation history is always conserved. This means that the connected user is maintened across all sessions, because he effectively is the same authorized user on each browser's instance.
Steps
To configure the frontend application you need a Tiledesk project (with the relative projectd id), your backend "authentication" service url (the REST endpoint that you will query to get the custom JWT token generated with your project secret) and you frontend application (a web page where the widget is hosted and configured for custom auth)
The following are the steps involved in our tutorial:
Create a Tiledesk Project
Setup the backend authentication app
Setup the frontend app
Create a Tiledesk Project
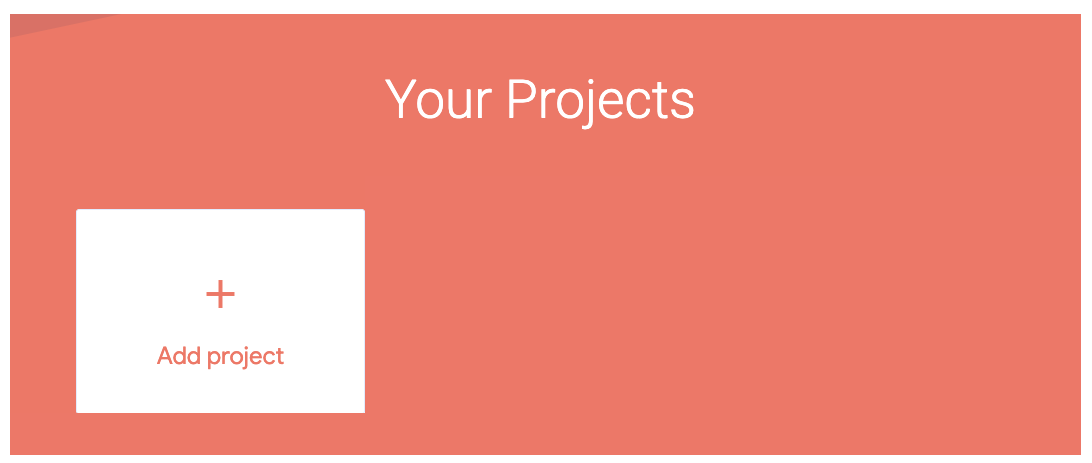
First of all create a Tiledesk project. It's easy, just click on "Add project".
Now choose a name for your project (i.e. JWT Auth Tutorial) and press Create project (leave all the options on their default values):
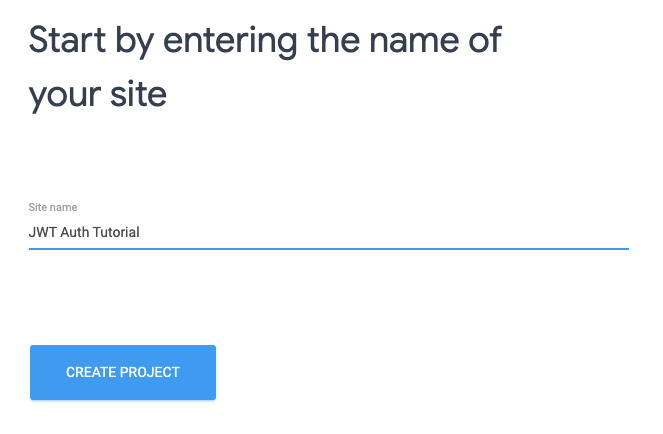
Your project is ready.
Setup the Backend authentication app
To develop our app logic, we'll need a web application endpoint that will run your own authentication code and will reply with a JWT that you'll use in the Widget.
We'll use the Repl.it service to fast create our own NodeJS web application endpoint.
Develop your application logic. Let's fork!
We simply fork the tutorial application, available at this url:
https://replit.com/@tiledesk/tiledesk-jwt-token-example#index.js
Use the fork button and choose a name for your app:
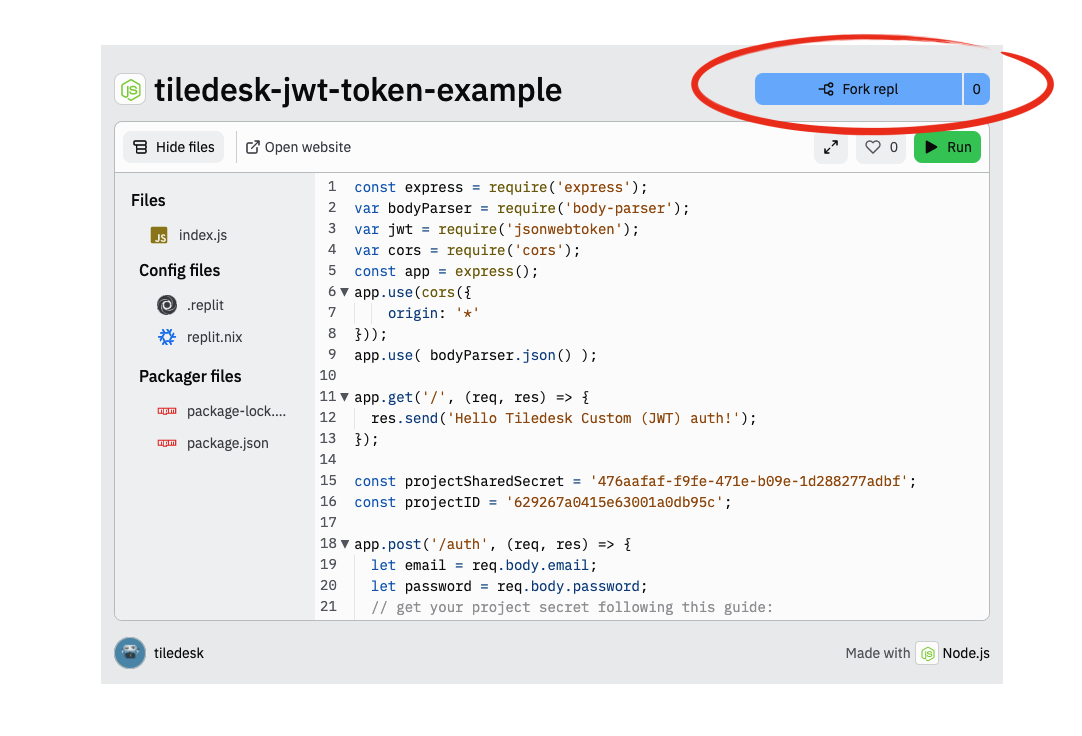
The app is forked and ready to run.
Now move back to your Tiledesk project's Settings > Project Settings > General section and copy the Project id.
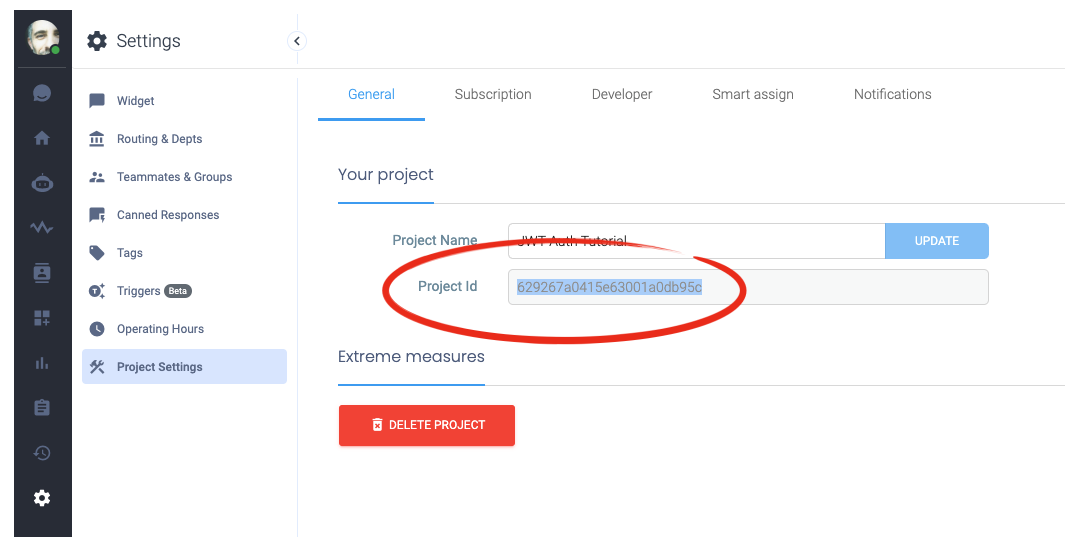
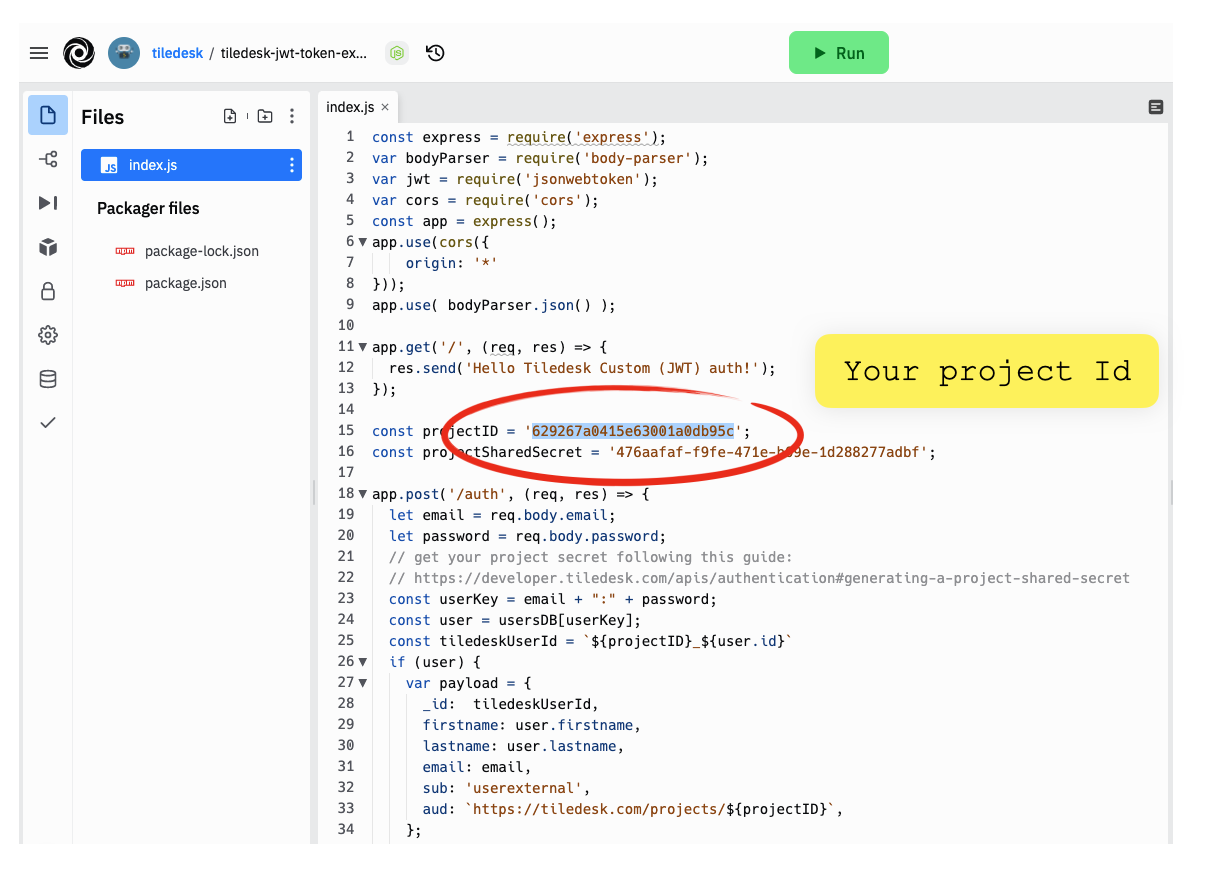
Copy and paste the project id here in the index.js file of your nodeJS app on replit, as shown in the figure:
Now move back (again) to your Tiledesk project's Settings > Project Settings > Developer section. We will generate a new secret key that will be used to sign your JWT token. Press "GENERATE SHARED SECRET" button.
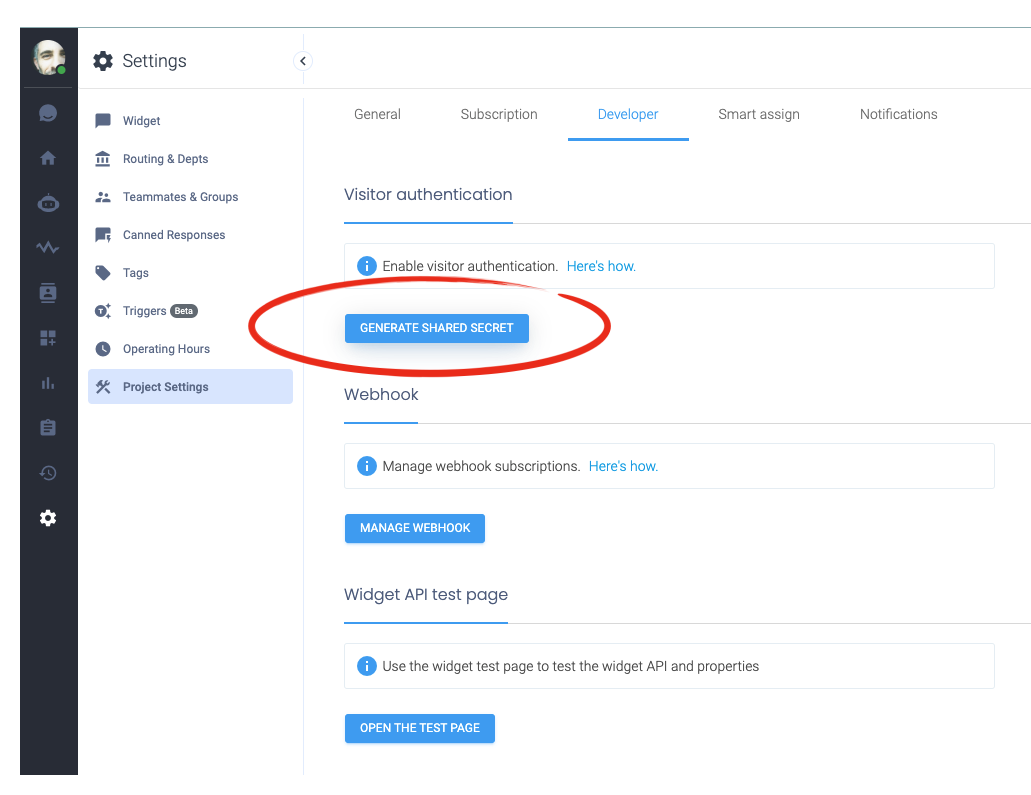
Take care that every time you generate e new secret the previous one is no more valid and you have to replace everywhere you used it.
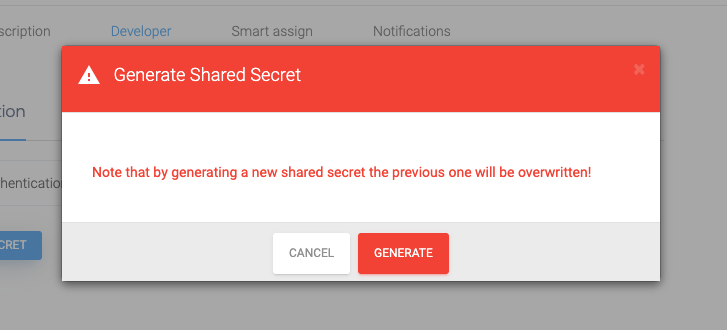
Now you can generate your secret.
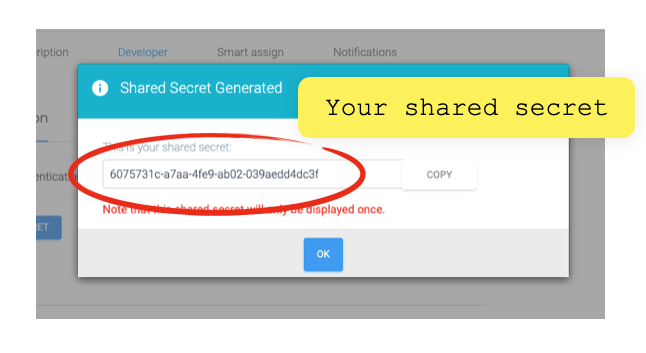
Copy and paste the secret key here in the index.js file of your nodeJS app on replit, as shown in the figure:
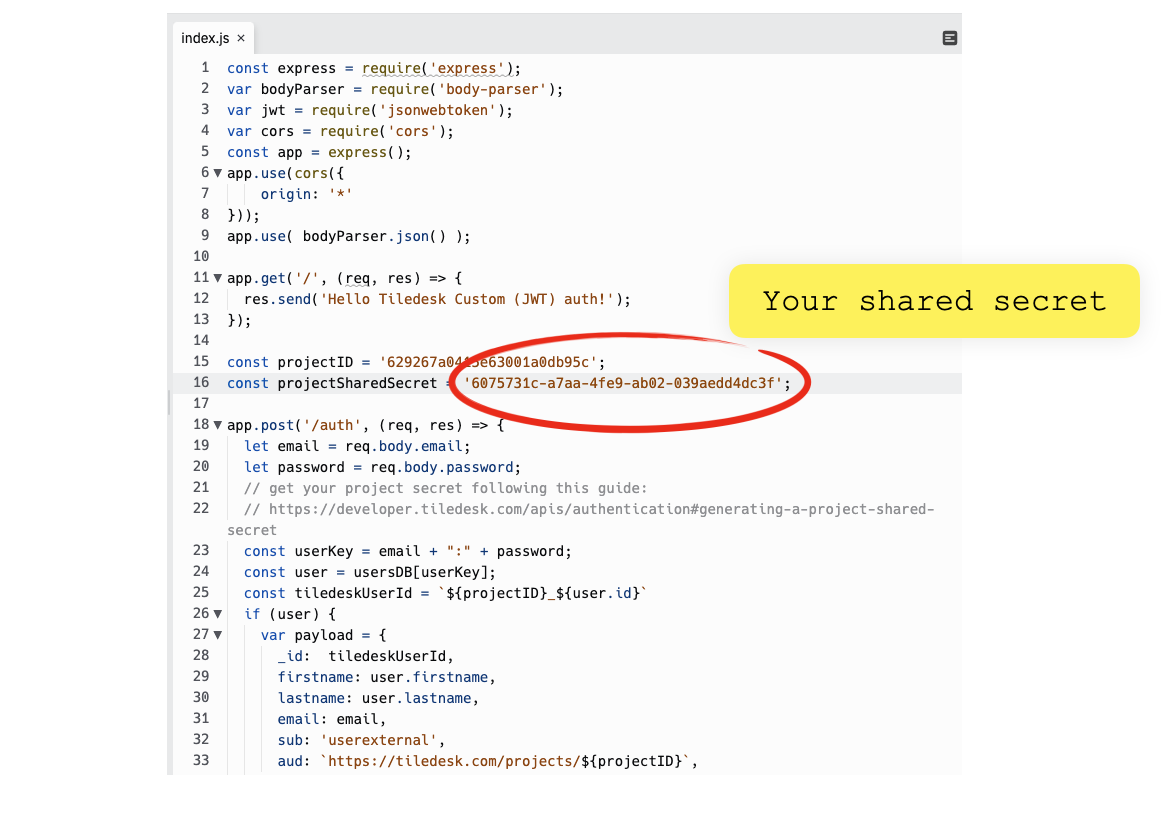
We made this app just a simple endpoint that "simulates" your own, getting your user credentials from the client, look up in the database for the user and accordingly using your projectID and your project secret to generate a signed Tiledesk JWT to reply back to the widget.
You can now press the "Run" button on top of your project. Your backend is now running and ready to accept authentication requests from your widget.
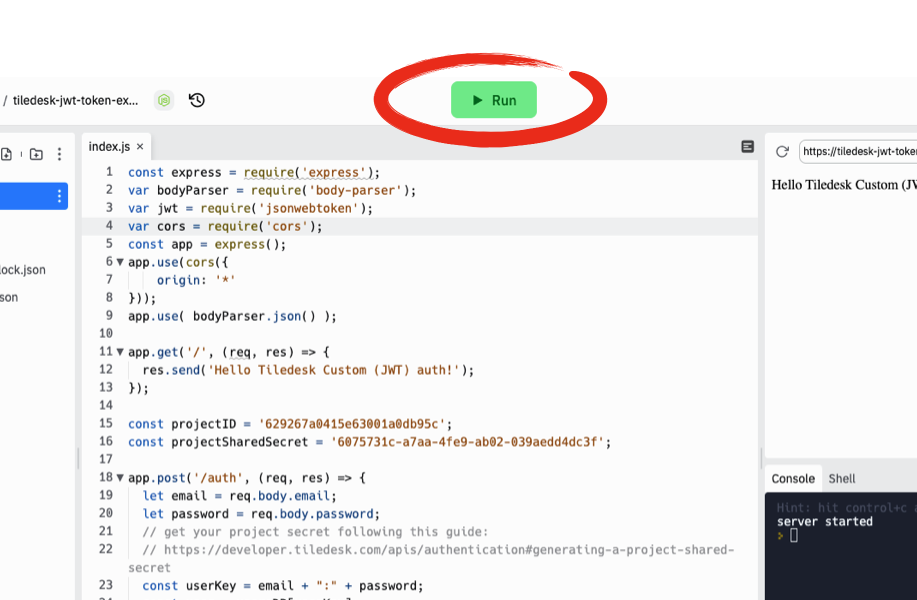
All authentication requests will point to the following url (and a POST method sa we'll see later):
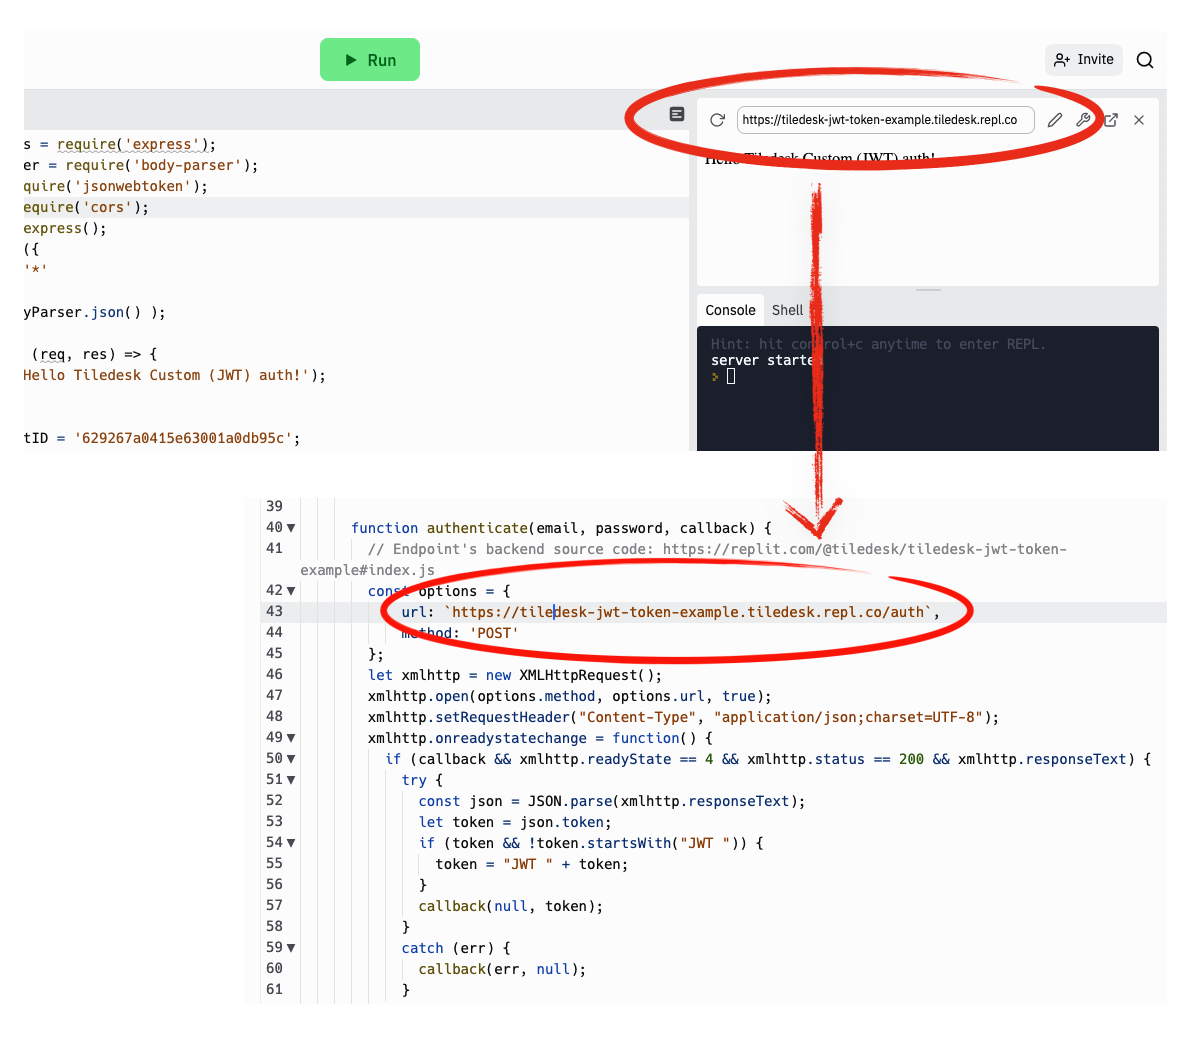
Authentication Endpoint: https://tiledesk-jwt-token-example.tiledesk.repl.co/auth
We'll refer to this endpoint later in the tutorial.
Setup the Frontend
The frontend source project - a web page with the widget configuration code - is available at the following replit page:
https://replit.com/@tiledesk/Tiledesk-HTML-Site#custom-authentication-example.html
You can easily "fork" the project or clone it on your frontend application. Then modify it to accomplish your backend configuration (see Backend setup).
Now paste the project id in the projectid property of the Widget's settings in the page source code:
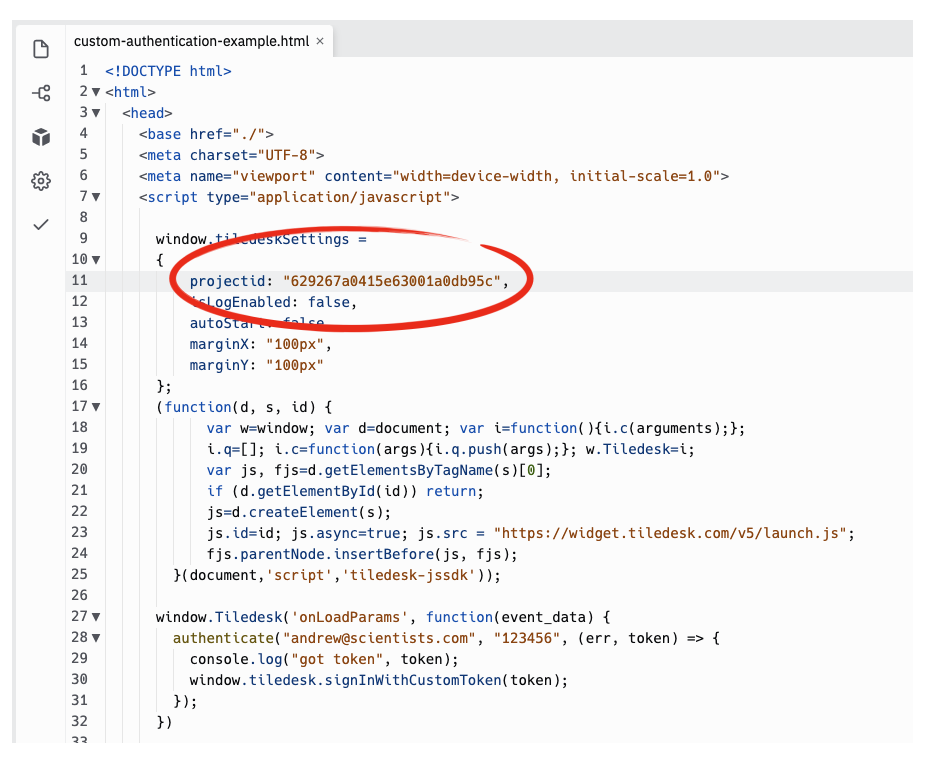
Now move to the authenticate method, and setup the authentication url using the backend endpoint. Get the service base url from the side panel (see the figure) and add /auth at the end to create the url for the authentication endopoint:
Our application is now ready. You can run it and test it in many browsers. You will notice that the conversation history will refer to the same user ([email protected]) coming from you mock database.
If you have any problems do not esitate to write us on our Community forum!
See you on our next tutorial!
Do you have suggestions on this article? Please send us your feedback writing an email to [email protected]
Last updated