Tutorial 1 - Dialogflow as external chatbot
Learn how to programmatically embed external chatbots in Tiledesk using External Chatbots APIs and Dialogflow Agents.
NOTE: this tutorial uses Dialogflow just as an example for a programmatic external chatbot integration. If you instead need to easily embed your Dialogflow Agent in your conversations, please use the Tiledesk Dialogflow Connector, the out-of-the-box Dialogflow integration that doesn't require programming skills.
Introduction
Integrating Dialogflow agents in Tiledesk offers many advantages, first of all the possibility to handoff current chatbot's conversation to humans. This is a very common task in chatbot integration design, because a chatbot cannot always satisfy every user request or simply because the first chatbot was there just to welcome the user, get the user question and some user data (i.e. email, name), choose the right team and then forward the request to the first available agent.
We just created this first toturial to allow a more customized integration experience with Dialogflow, allowing you to understand how easy is to attach an external chatbot, Dialogflow in this case, to Tiledesk and switch conversation to humans when needed.
We'll use Heroku and Github to crete our first integration project.
Fork the tutorial code
The tutorial code is already available on Github here.
Fork the tutorial code using the Fork button. Now you have a copy of the tutorial on your own repo.
Create the Heroku app
If you don't have a Heroku account please create one. Once you created your account you will move to the application's dashboard here.
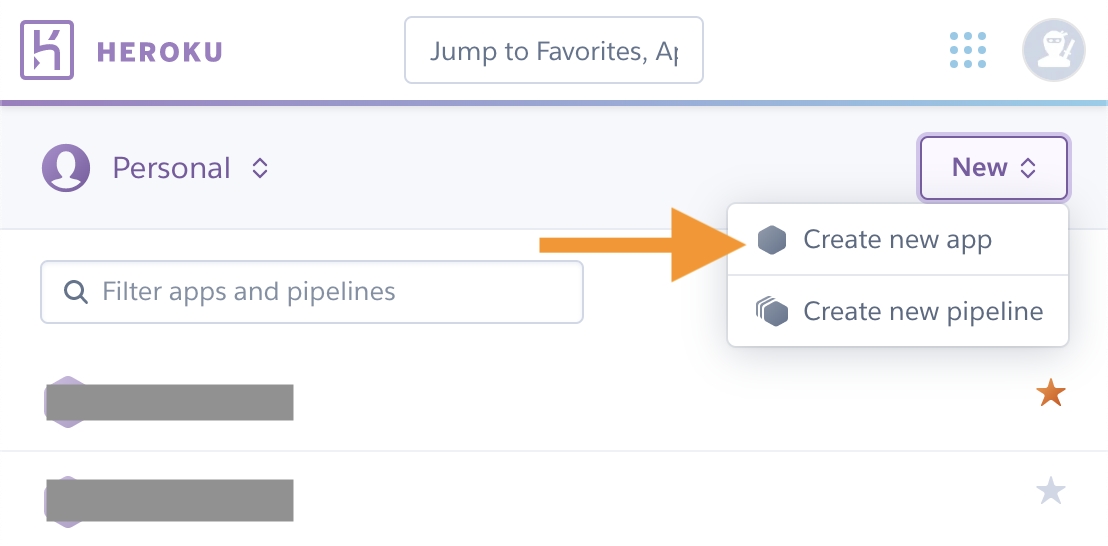
In the top right corner menù of the Heroku Dashboard press New > Create new app option:
Now choose a name for your application. You can choose whatever name you prefer, we choose my-tiledesk-proxy:
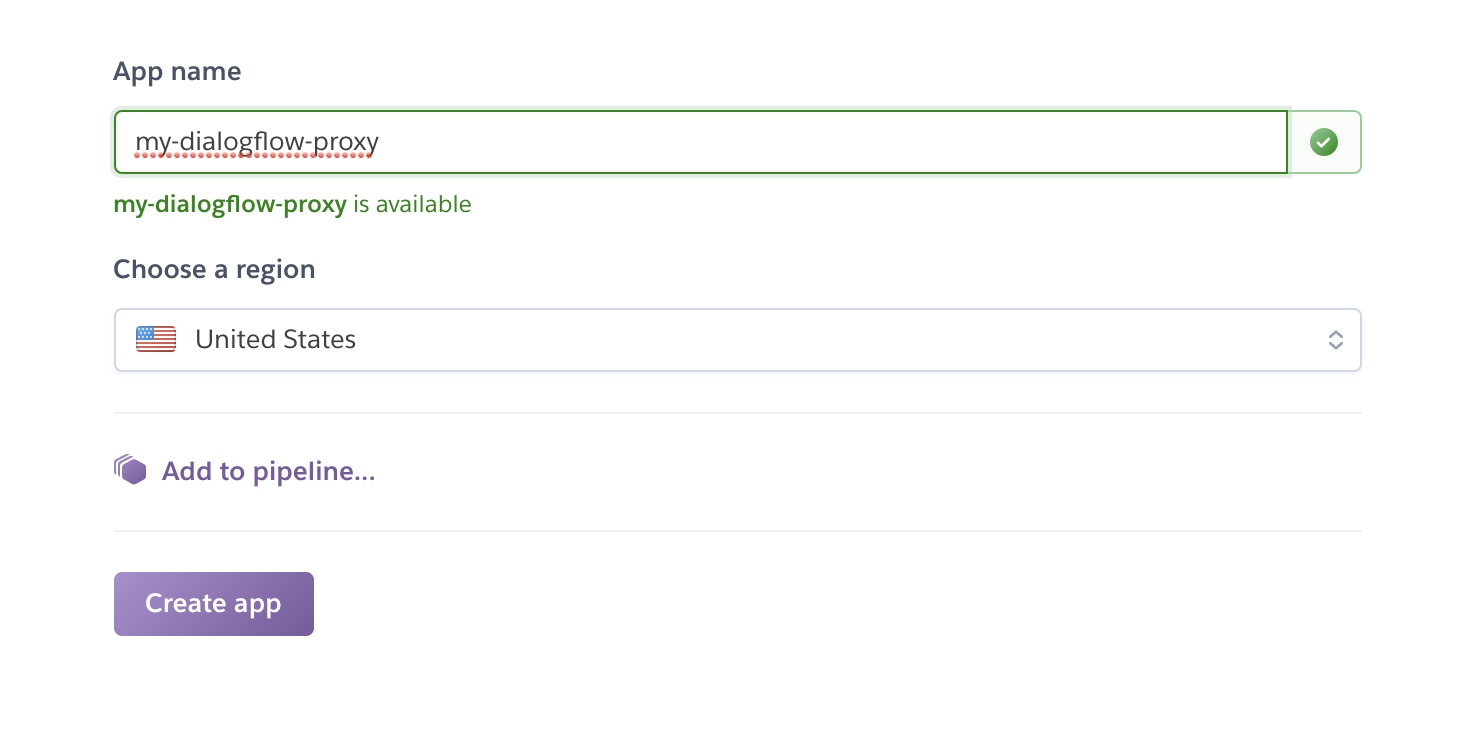
Leave all other settings as default and push the Create app button.
Connect Heroku app to your Github repo
Now in the "Deployment method" section select Github. In the "Connect to Github" section insert the exact name of the repo you just forked - tiledesk-dialogflow-proxy-tutorial - and press Search. If everything is correct Heroku will show your repo just below the search filed. Press "Connect".

Now that your Heroku's app is connected to Github you can enable automatic deploys, so Heroku will restart your app every time you push new code on the repo.

In this tutorial we suppose you already set up a Dialogflow agent and you already have the credentials file. If you do not have the Google Credentials file please refer to this tutorial.
Now that you have the credentials file on your hand open the Heroku Dashboard of your project and move to the Settings tab. Then, in the Config Vars section press the "Reveal config vars" button.
Add a new variable named firstbot** and fill his value field with the content of the credentials file you already created in the previous step:

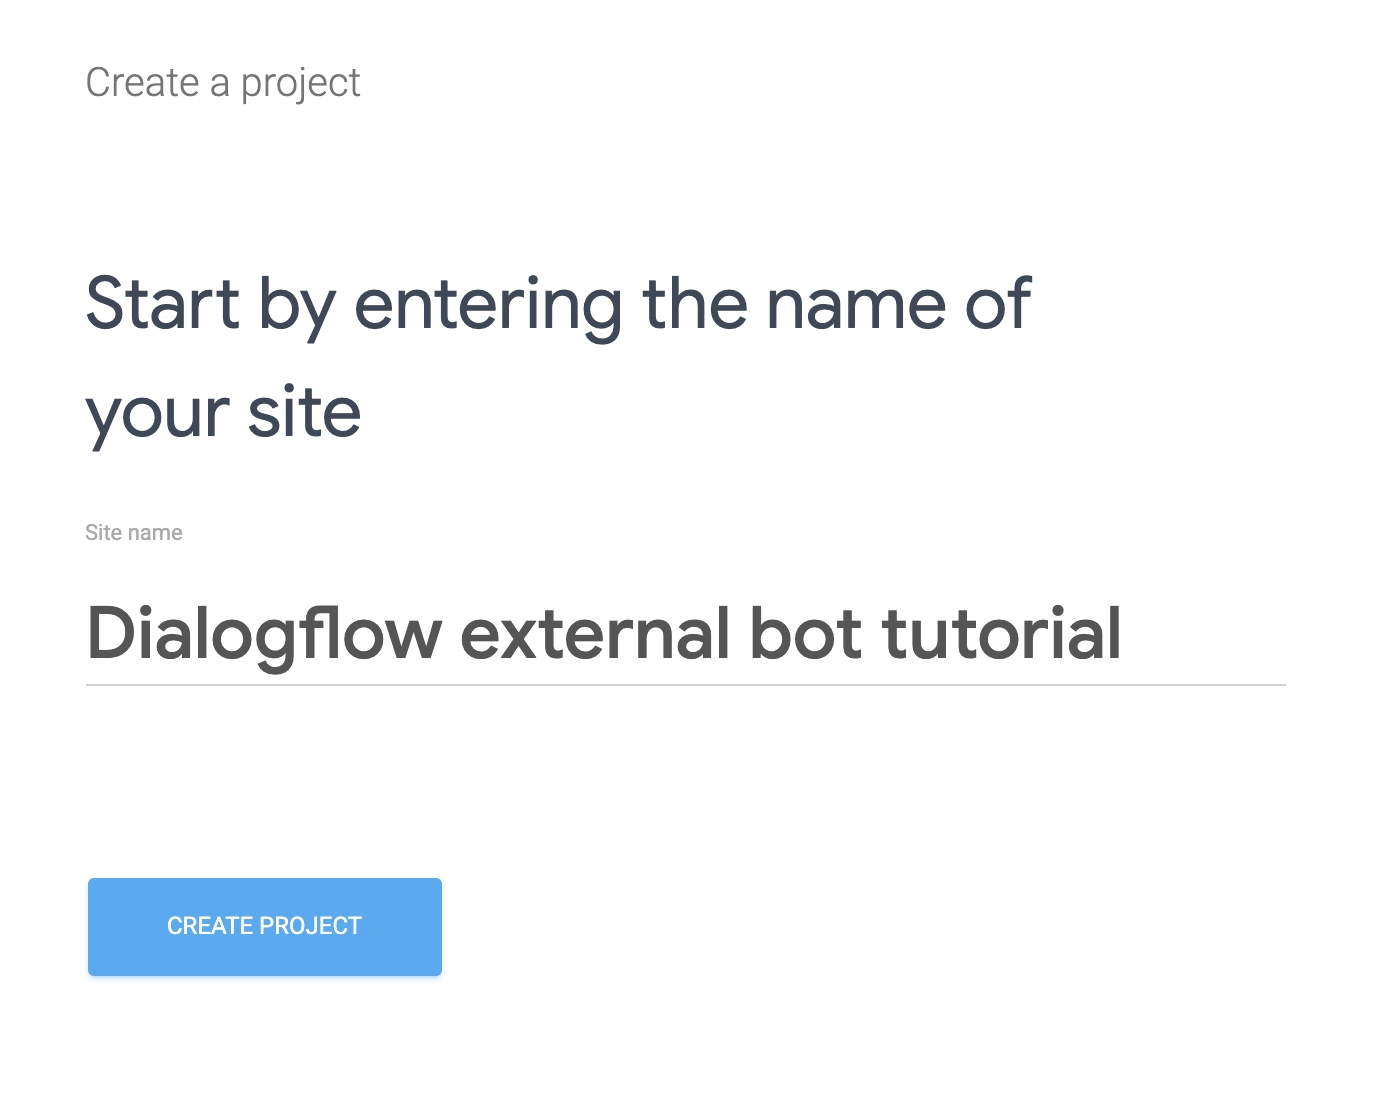
Now switch to Tiledesk console and create a new project. Enter whatever name you prefer.
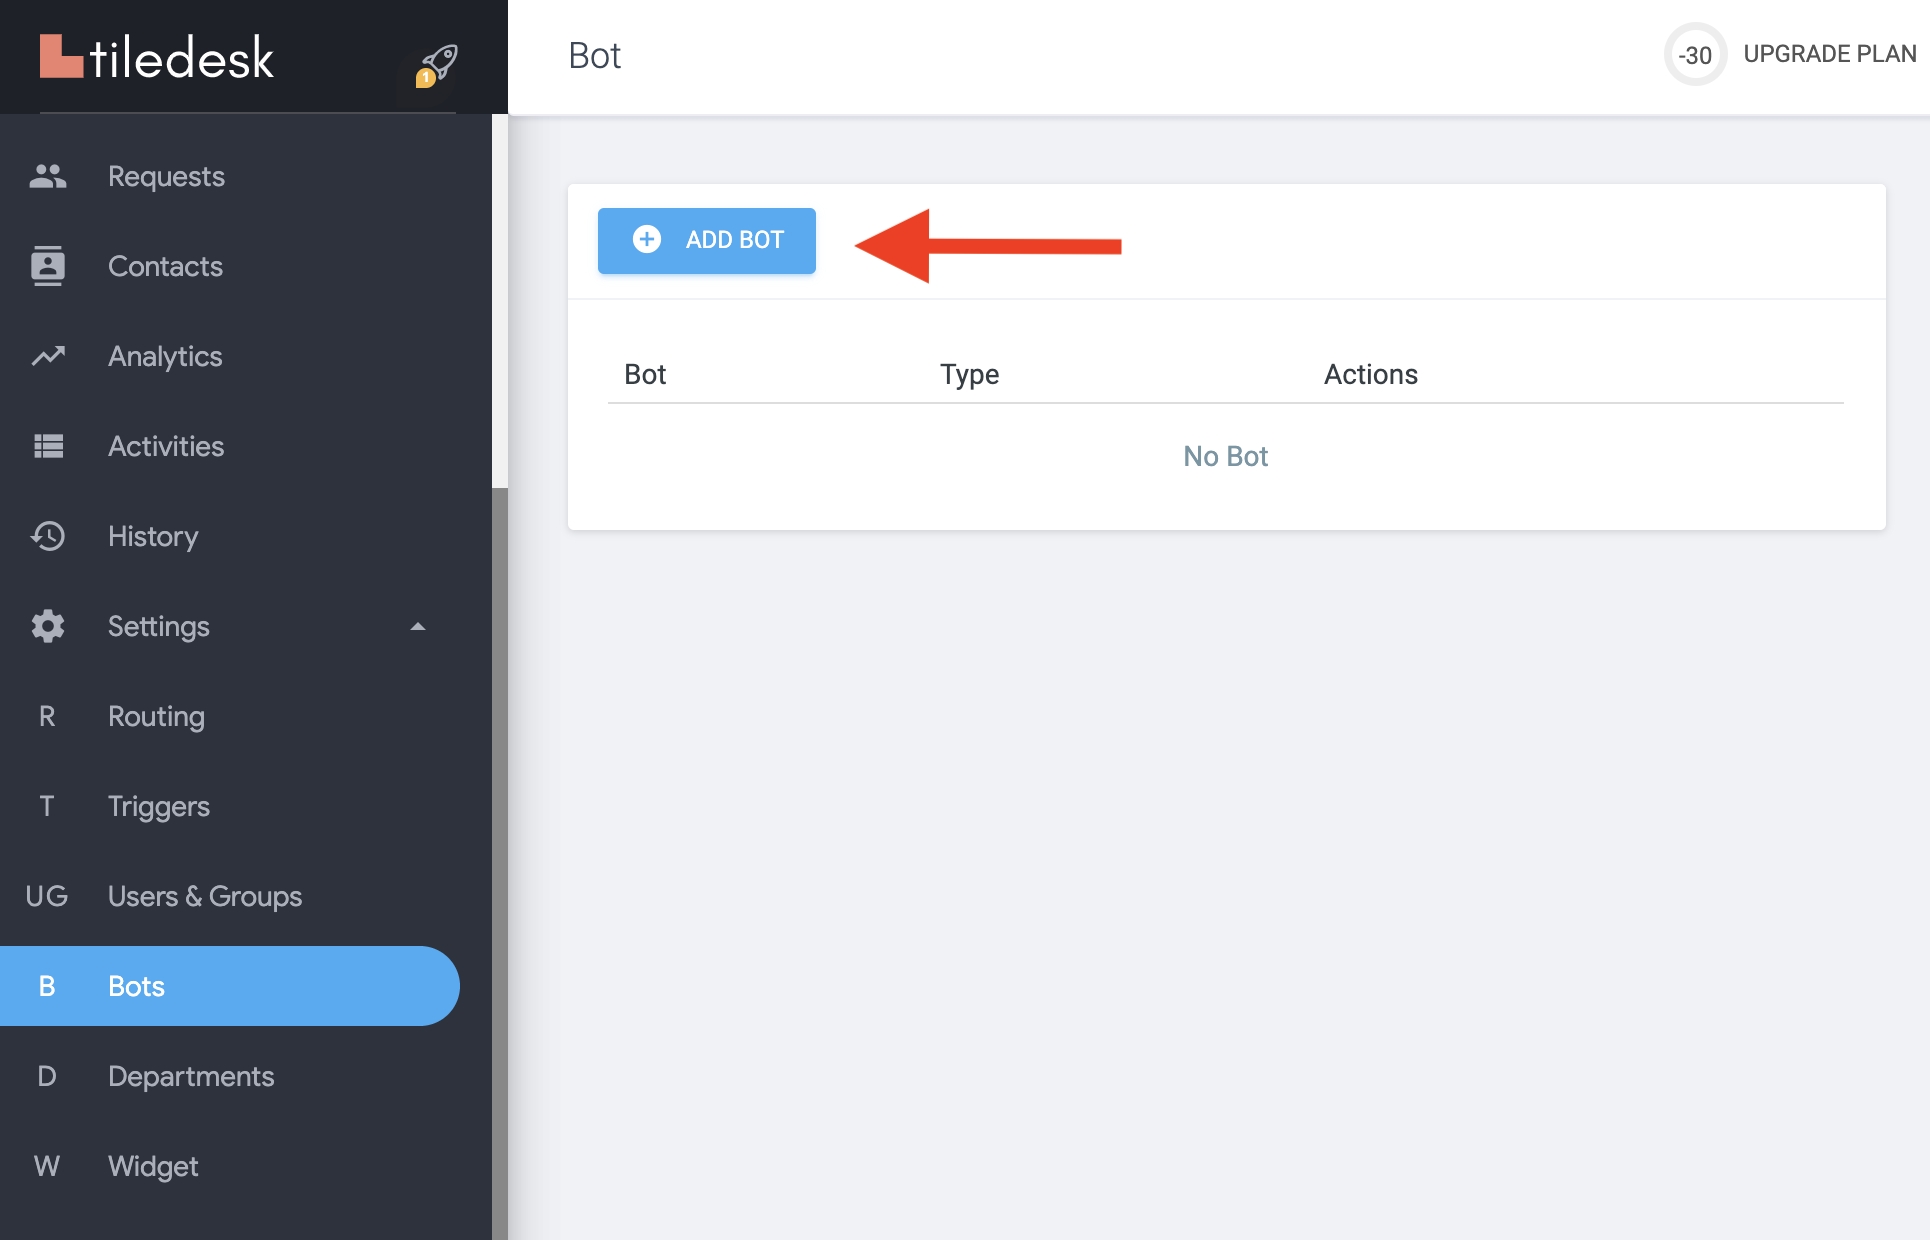
Now move to the Bots section and create a new bot pressing the ADD BOT button:
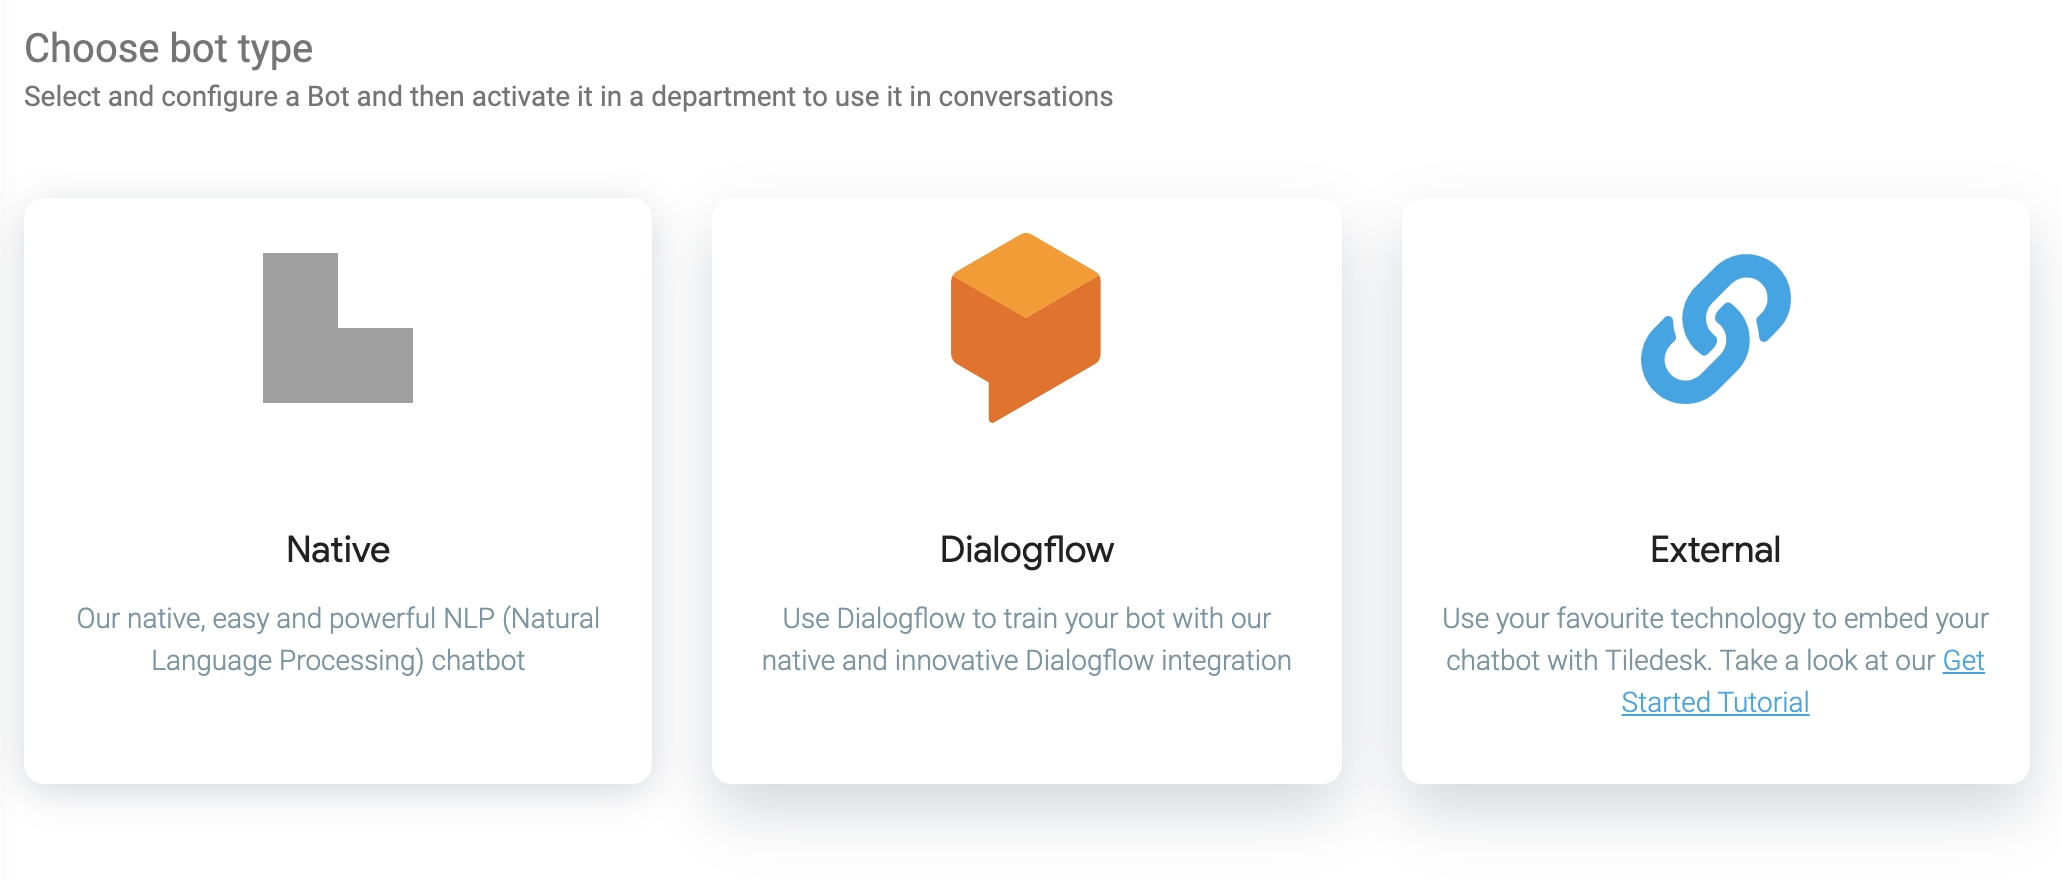
Choose the type External, not the Dialogflow one. This tutorial aims to connect you with a Dialogflow agent using the "external bot" feature, allowing you to have full control over the integration.
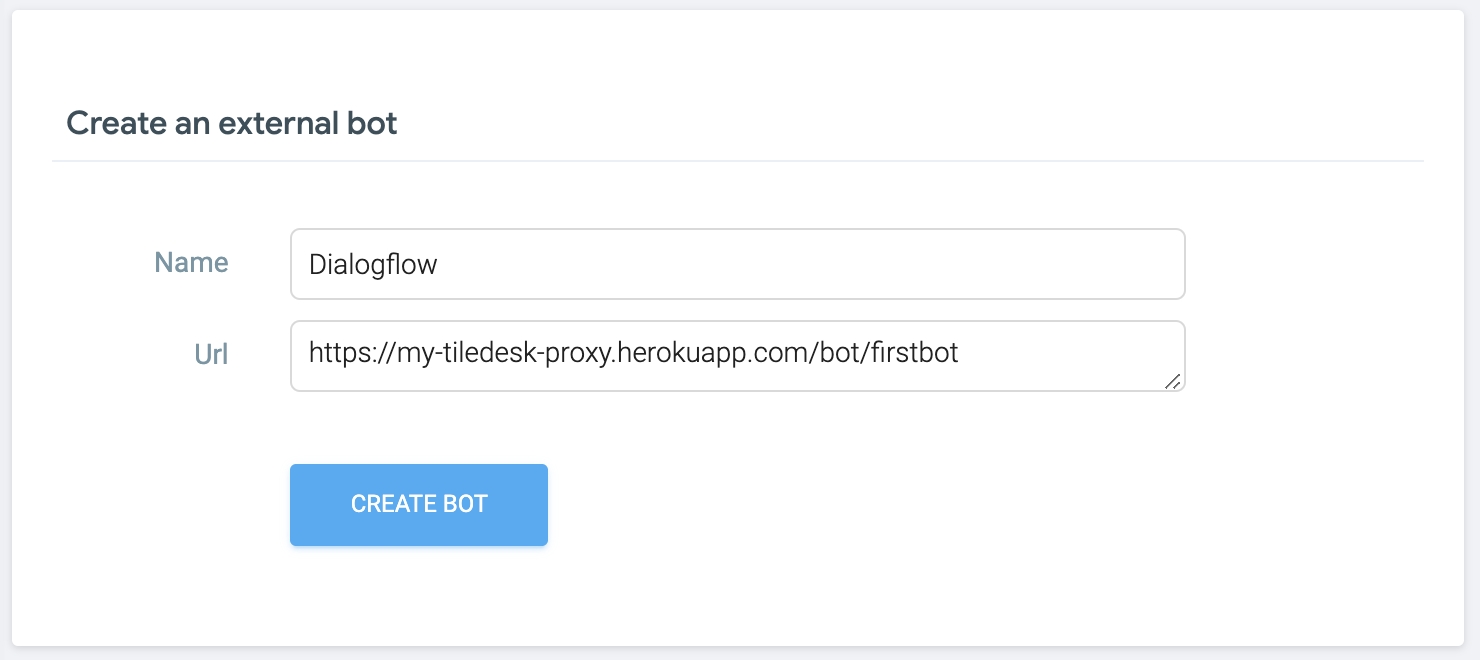
Choose whatever name you prefer for the bot. This name will also be the Sender name of the bot every time the bot writes something. But from the proxy code you are adding you can easily change this default name if you want.
Set in the url field the hostname of your heroku application followed by /bot/firstbot. Every time Tiledesk will invoke you bot it will send a HTTP POST request to this url.
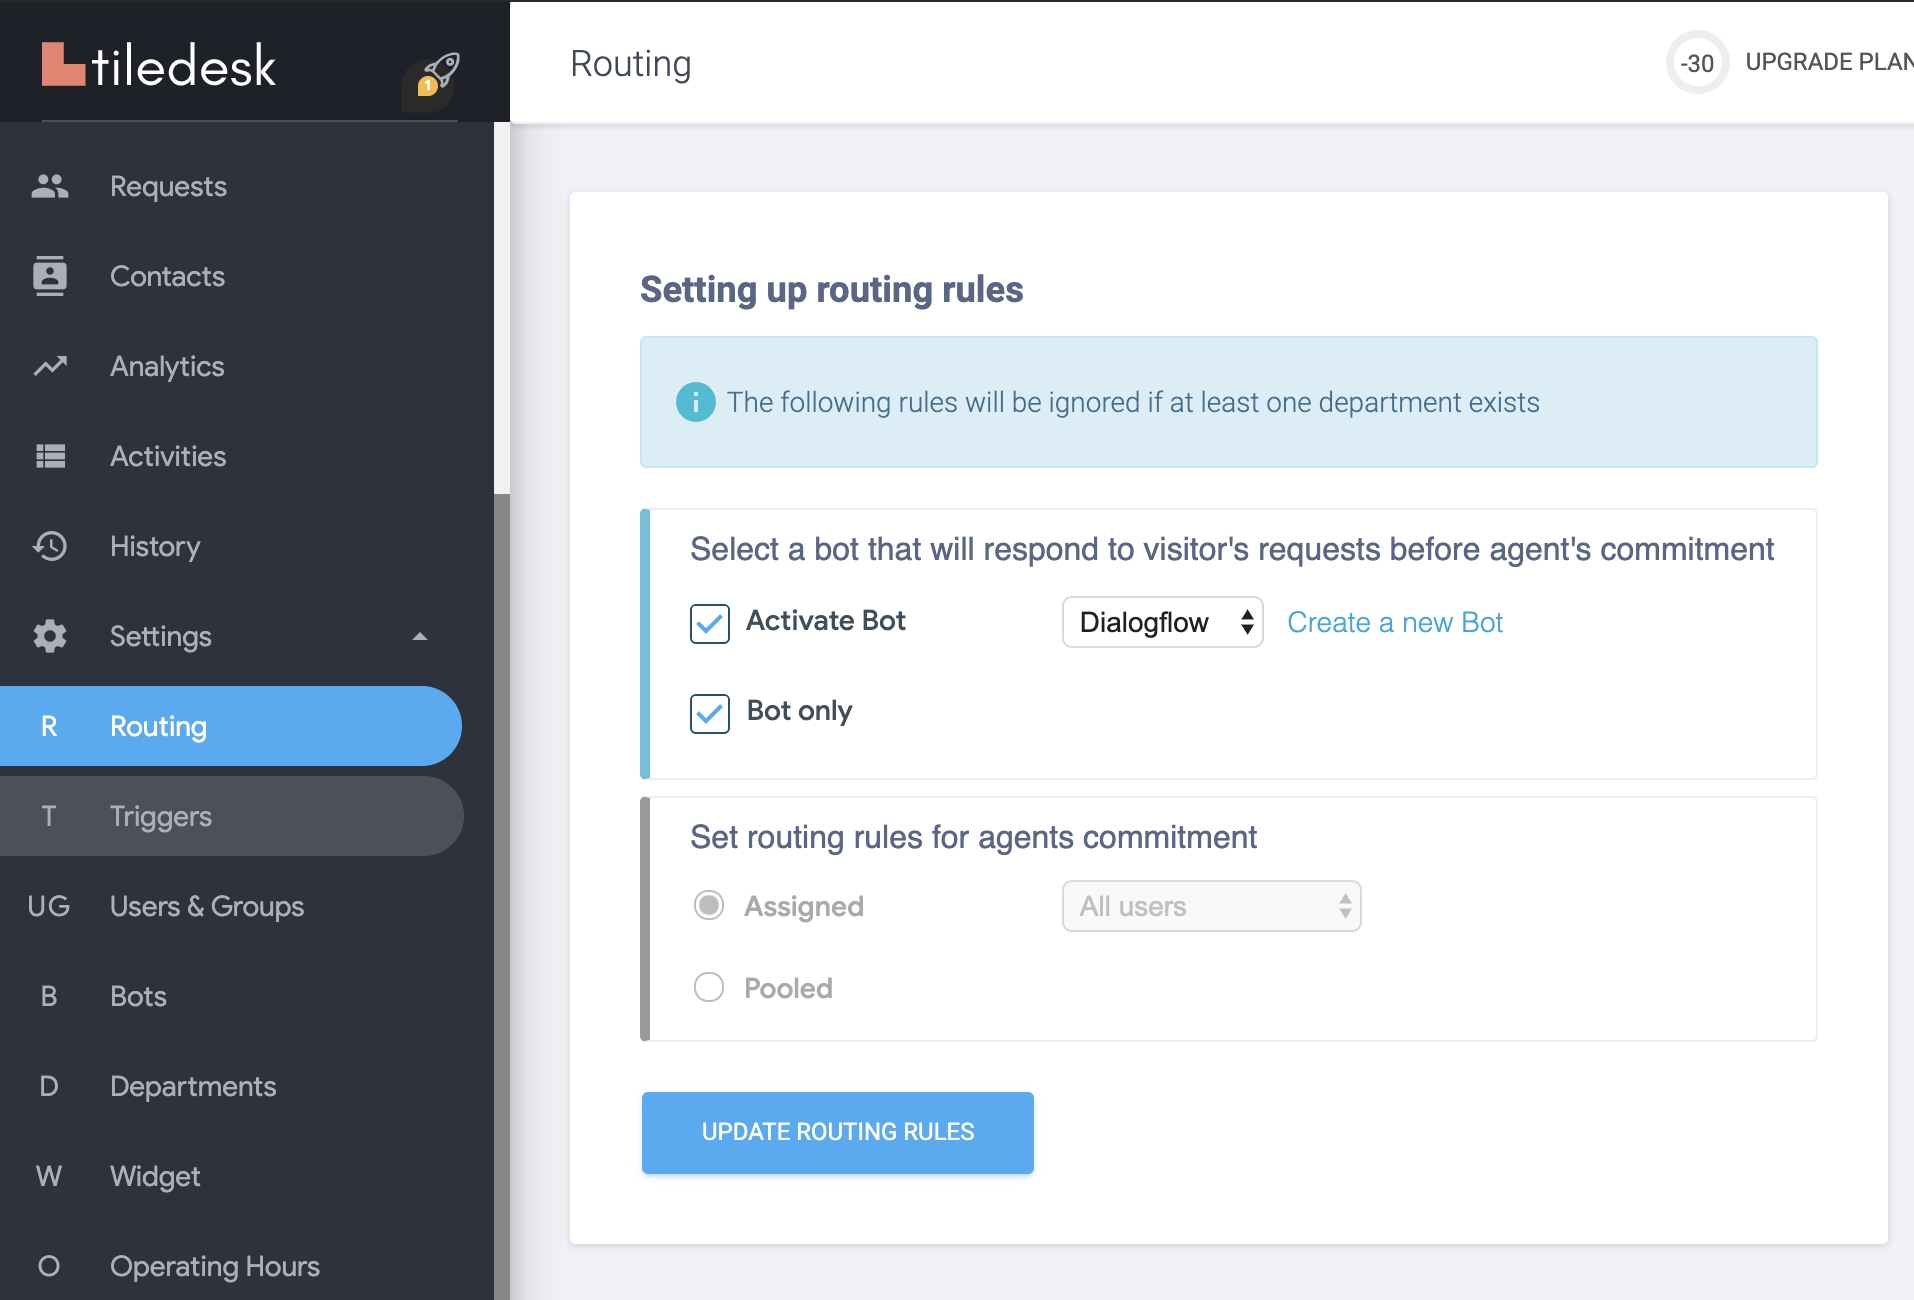
To activate the bot you must attach it to the default routing or to a department. For semplicity we'll use the default Routing. Choose the Routing option on the left menu, the switch on Activate Bot, and choose your Dialogflow bot from the right menu. Press UPDATE ROUTING RULES.
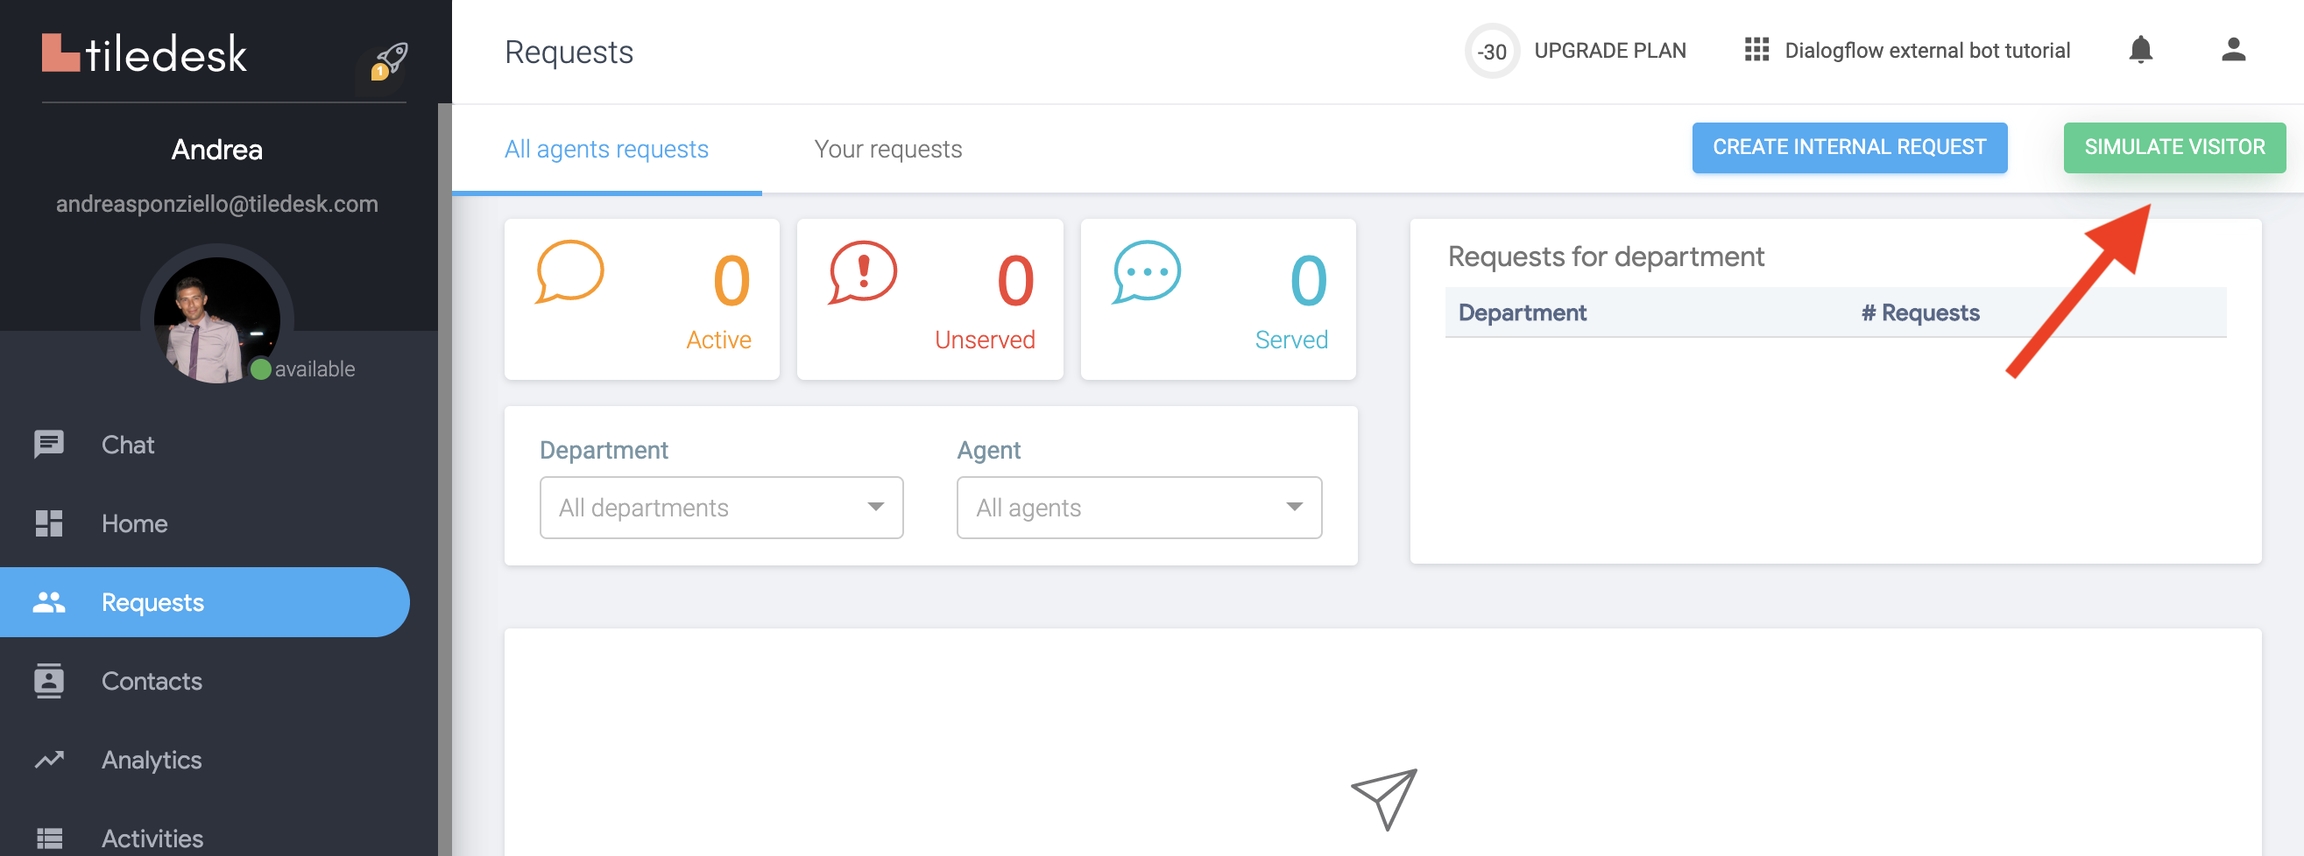
To test the bot, switch to the Requests option and press the SIMULATE VISITOR button as shown in the next figure.
On the widget test page press "New conversation" button. The default routing will start, sending a default "hello" message through a HTTP POST call to the external url. Your Dialogflow bot will reply, as you can see in the next picture.
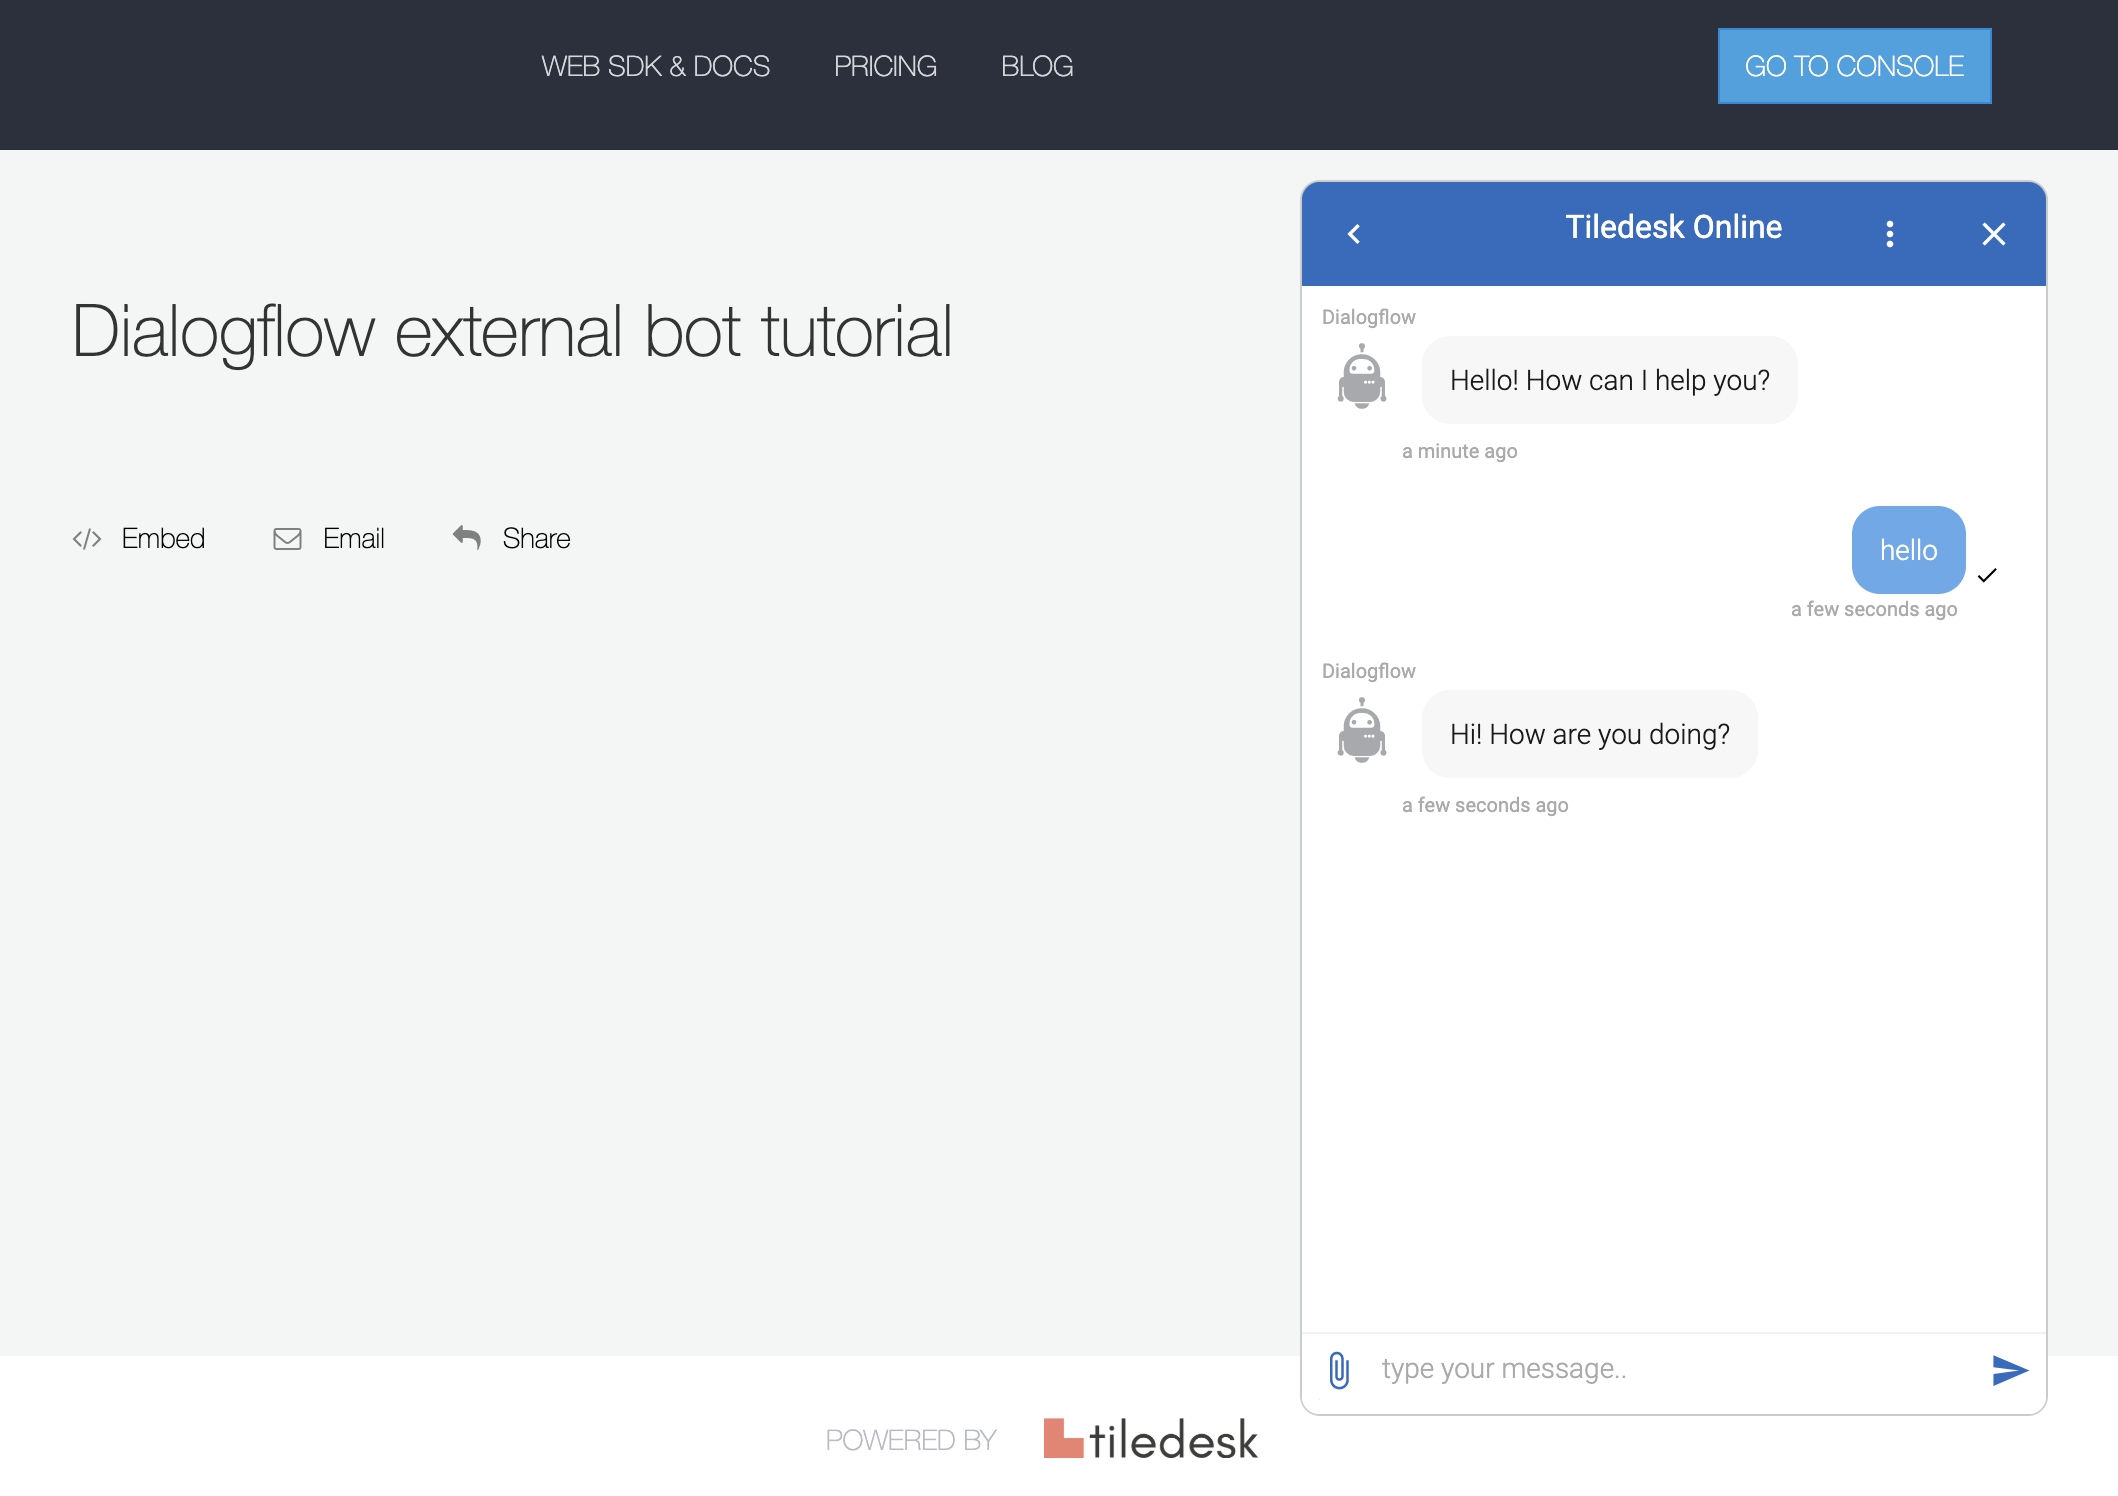
You can do much more in communicating with an external url, for example sending buttons or images. We will treat these and other tools in the next tutorials.
Chatbot handoff to Human Agents
To handoff control to Tiledesk agents the bot can simply reply \agent. So simply you can train a Dialogflow intent to reply "\agent" to a phrase like "I want to talk to an agent". As soon as Tiledesk receives the \agent command in reply to a conversation activates the human handoff and switches control to humans following the department rules.
You can also automatically activate switch to humans on a fallback (or a fallback repeating N times). So, if the user repeatedly triggers the fallback response (due to questions not correctly interpreted by the Dialogflow chatbot) the proxy passes control to a human agent.
Another approach can be to use the "confidence" of the reply to trigger the handoff if the same confidence is under a determined threshold.
Enjoy you custom Dialogflow connection!
Do you have feedback on this article? Please send us your feedback writing an email to [email protected]
Last updated
Was this helpful?