Build Custom App - Quick start
Introduction
You can build context-relevant, action-oriented apps (aka plugins) directly on top of Tiledesk with ease. We want customers to be confident that any app they connect to their Tiledesk account will be useful, work well and use their data responsibly.
A Tiledesk app is simply a small web application installed in the agent interface using an iFrame that extends the product's functionality in some way. You can use any web technology to create a Tiledesk app, for example: HTML, Javascript, NodeJs, Java, Python, etc.
Quick start
To keep things simple in this quick start, you'll install and use an app named Example Echo App in Tiledesk. Example Echo App is an example app created to show you how to create a new Tiledesk app for the Tiledesk App Store. With Example Echo App you can find also how to read and use the Tiledesk context parameters passed by the Tiledesk clients (dashboard, webchat and widget) to your app.
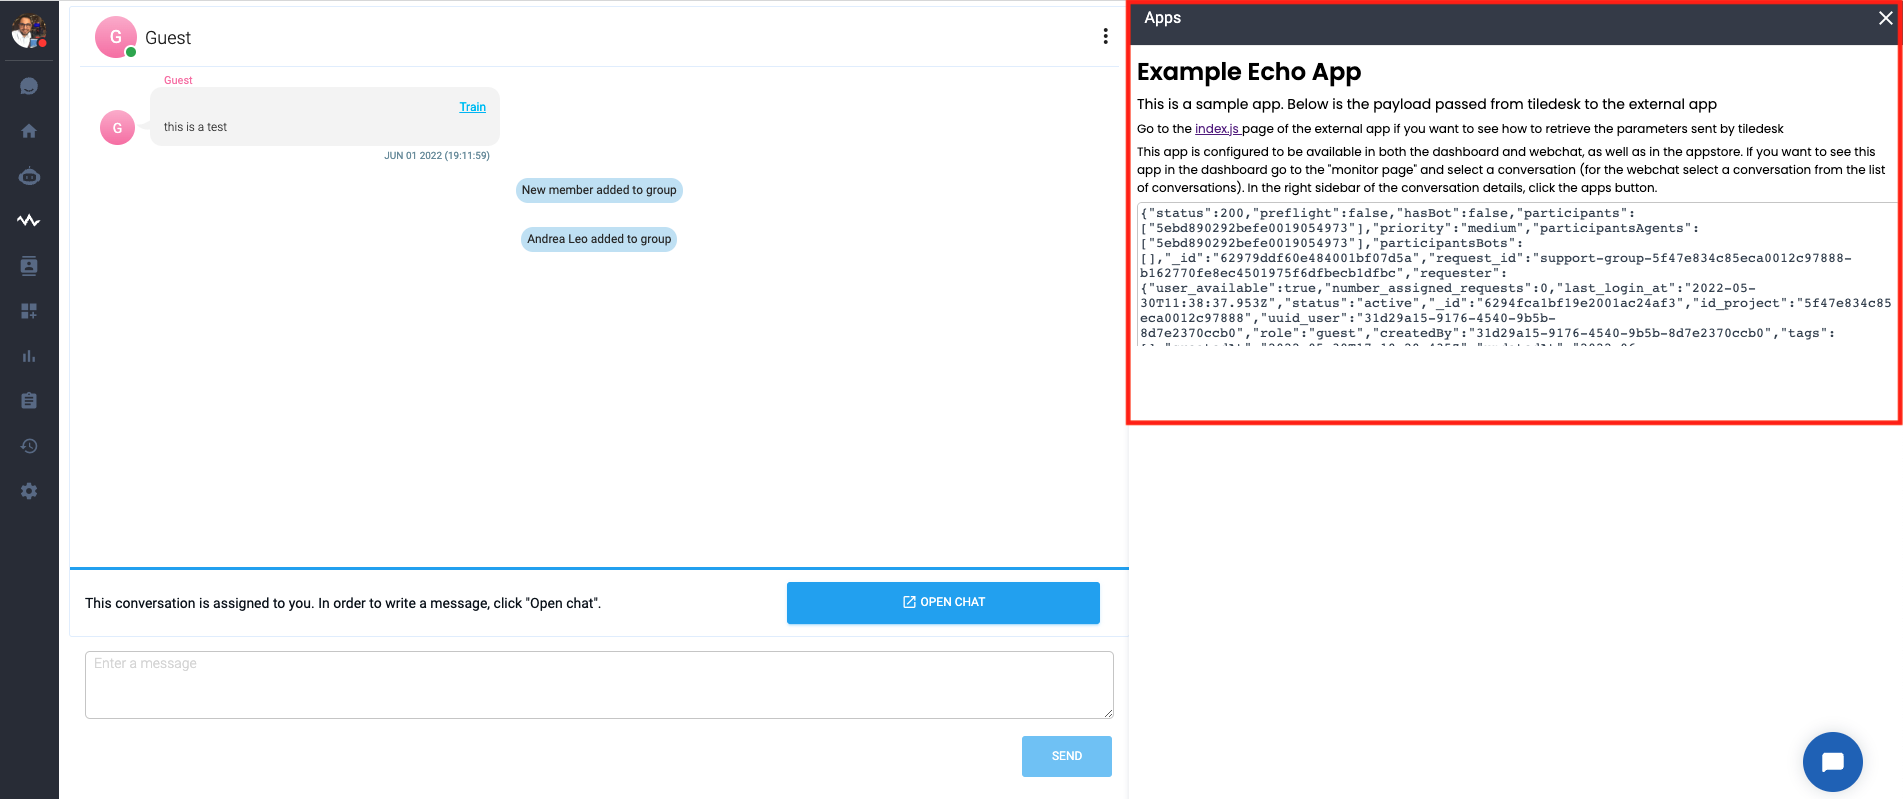
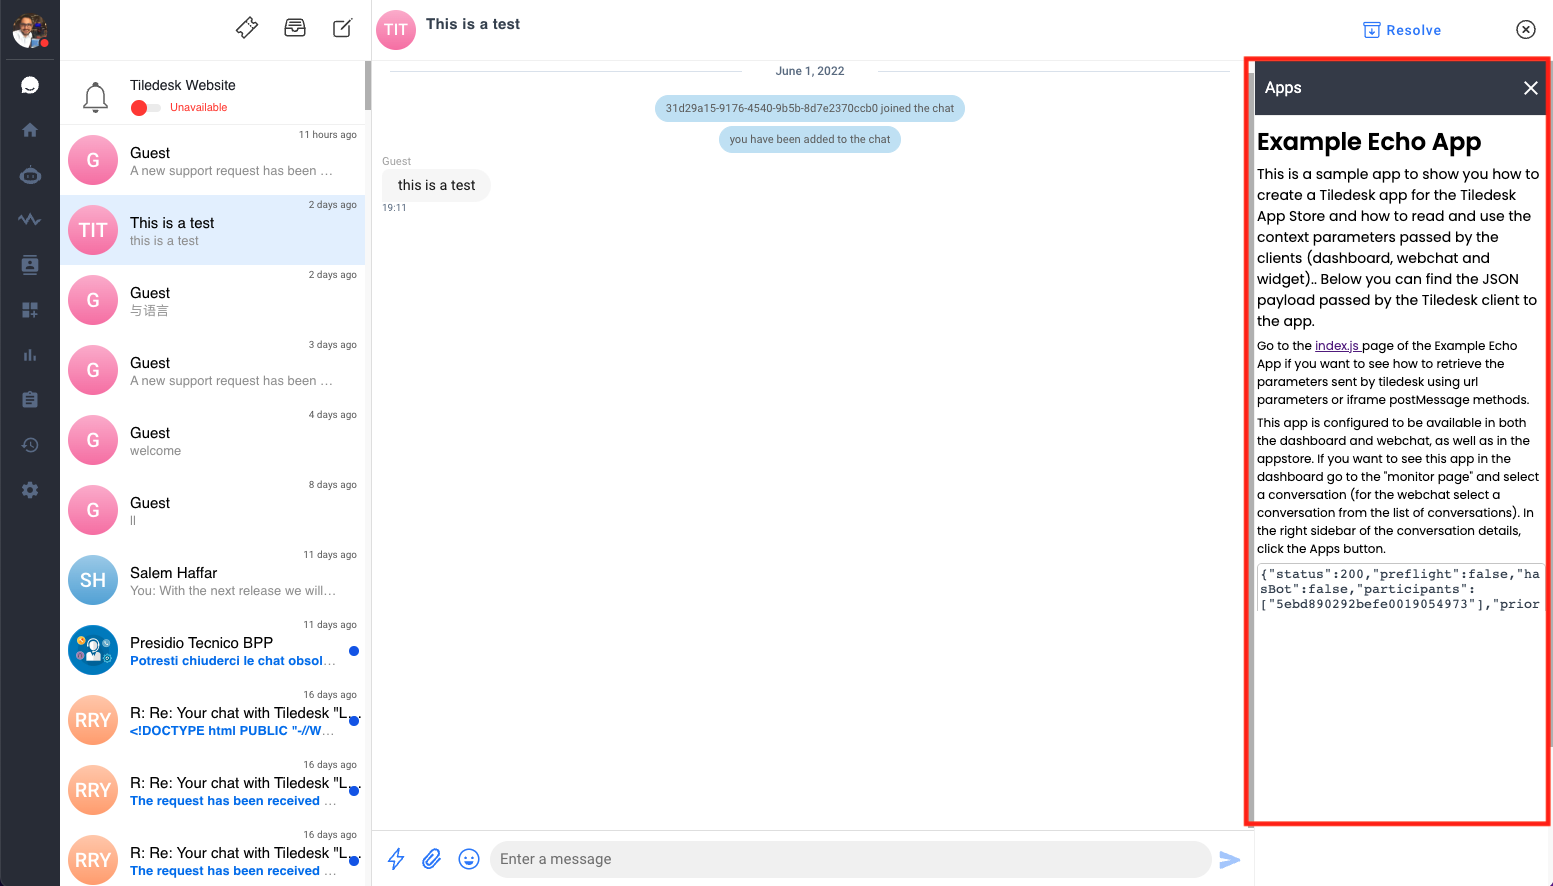
Here's Example Echo App in the conversation dashboard sidebar:
Preparation
If you don't already have a Tiledesk account, register at https://panel.tiledesk.com/v3/dashboard/#/signup
Navigate to the Example Echo App in the Tiledesk App Store
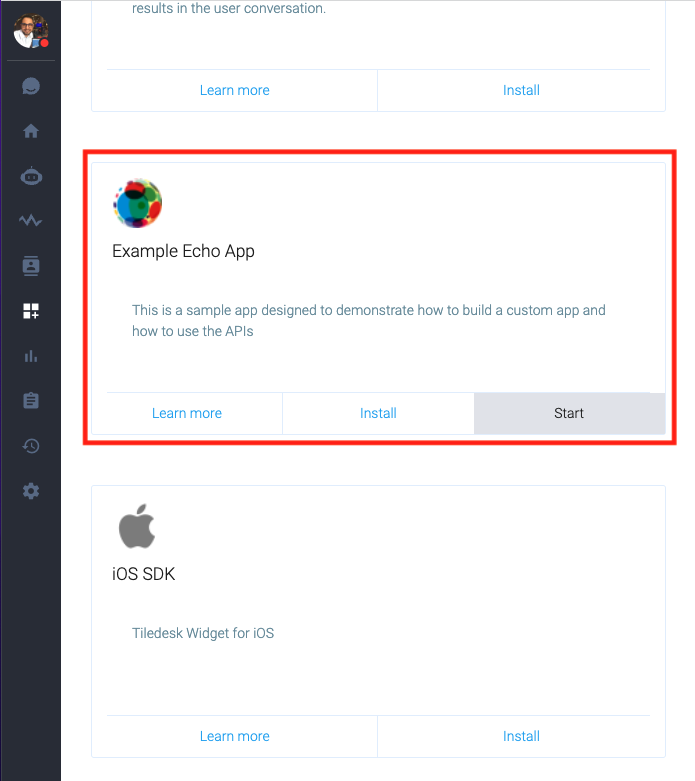
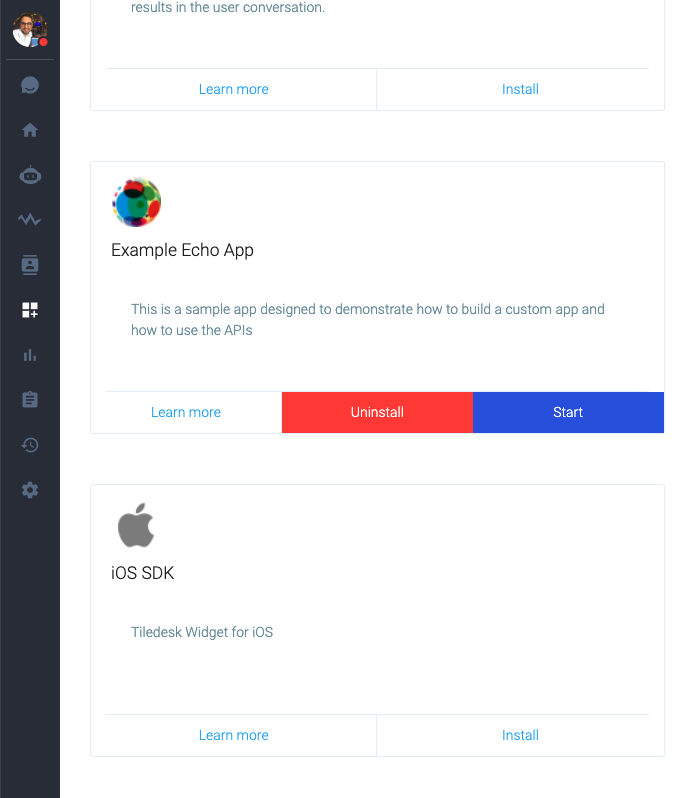
Click Install to install Example Echo App on your Tiledesk project
Try it out
Go to the Monitor menu and get data from a conversation that's open in the dashboard interface.
Open any conversation in the Monitor interface.
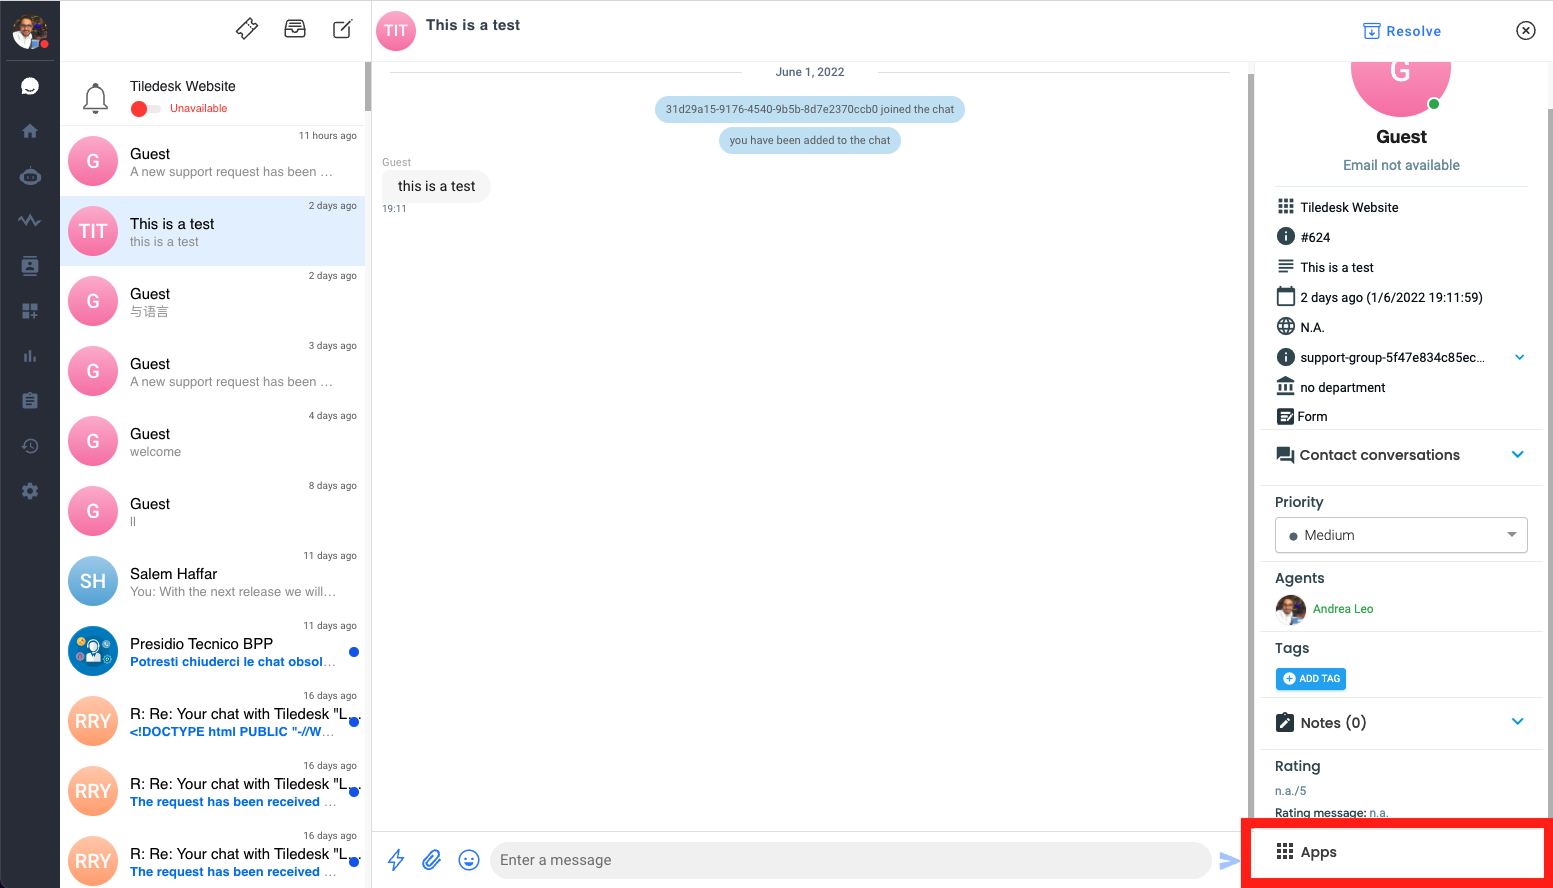
To open the Example Echo App in the conversation sidebar, click the Apps icon in the bottom-right side of the conversation panel.
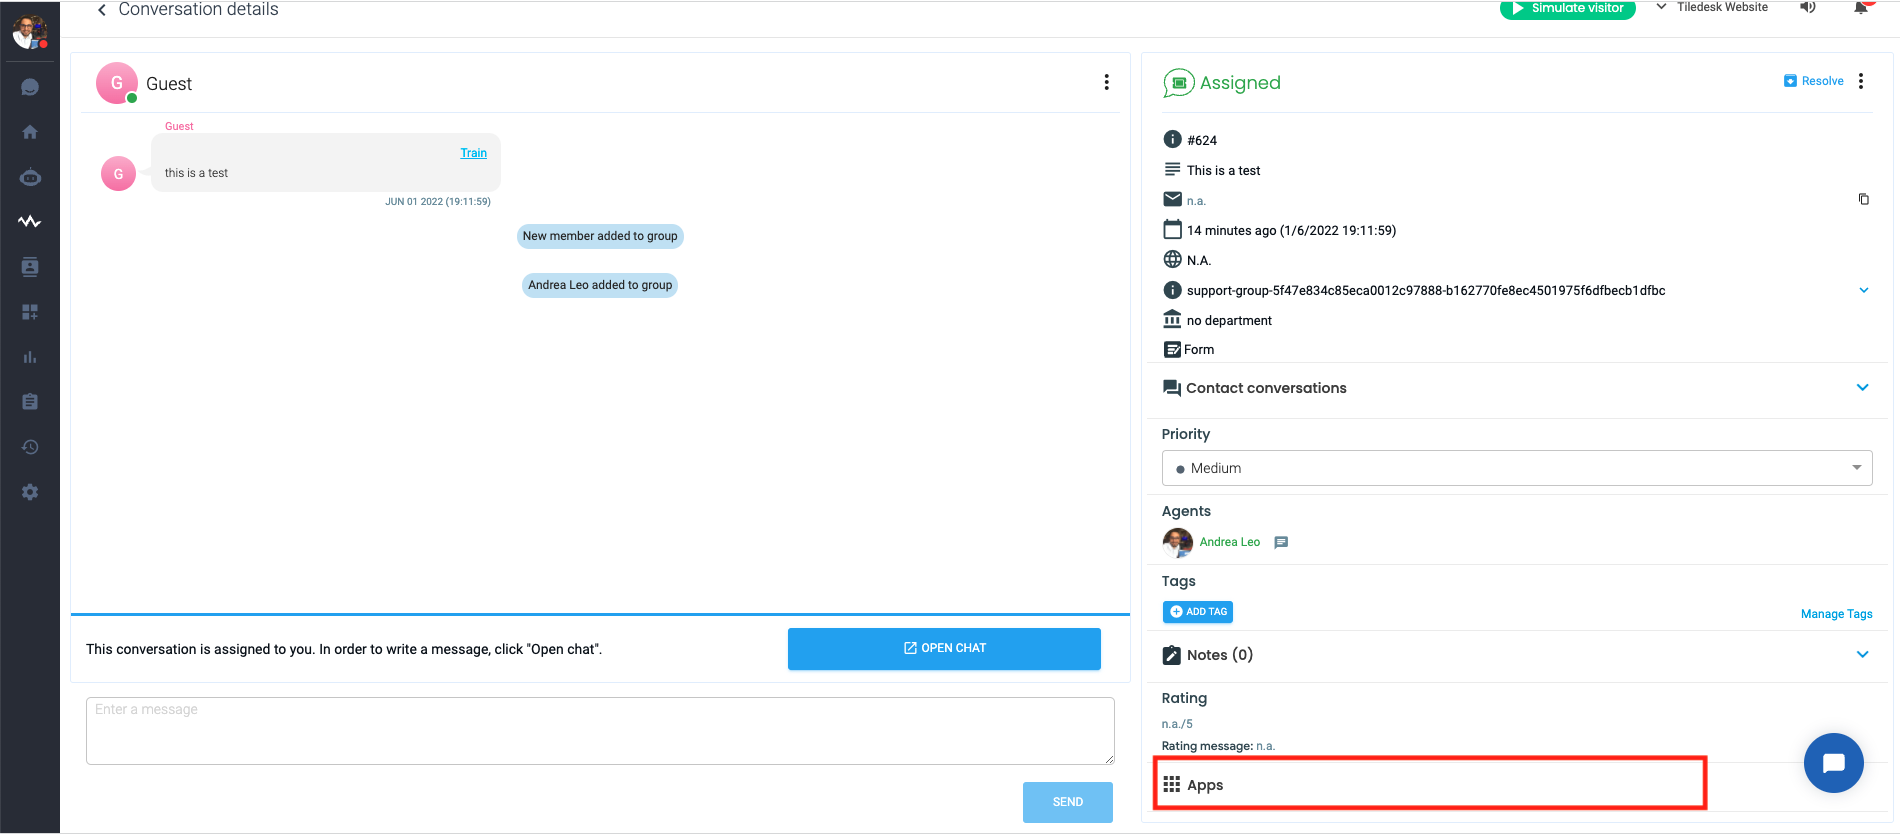
The Example Echo App is loaded by Tiledesk using an iframe. In the textarea of the app you can find the JSON context payload passed by the Tiledesk client (Conversation Detail in this example) to the app.

This app is configured to be available in both the dashboard and webchat, as well as in the appstore. If you want also to see this app in the webchat select a conversation from the list of conversations and in the right sidebar of the conversation details, click the Apps button.
The Example Echo App is loaded by Tiledesk:
Read the Tiledesk Context parameters using iframe postMessage
The JSON context payload showed in the text area is passed using the iframe postMessage method. Using Javascript you can subscribe to the iframe postMessage method using the code below:
Below you can find the structure of the JSON context payload:
appname: the name of the app
request: the request object
token: the jwt token of the user logged in to the UI
Be careful with the code below you are continuously subscribed to the contextual parameters of Tiledesk. So if the context parameters change, for example because the conversation data changes (for example a new tag is added to the conversation), the subscription will be performed in real time.
Read the Tiledesk Context parameters using iframe query url parameters
You can also read some Tiledesk Context parameters getting the query url parameters passed in GET to the iframe. Tiledesk passes the following query parameters using the HTTP GET method:
request_id: A unique identifier for the request which is given to Tiledesk. Follow this pattern 'support-group-UUID'. You can find more info here
project_id: The unique identifier of the Tiledesk project
app_name: The name of the Tiledesk app
You can use the Tiledesk REST API, for example the Request detail REST API, to obtain more information about the conversation passing the request_id and the project_id parameters.
Go to the index.js page of the Example Echo App if you want to see how to retrieve the parameters sent by tiledesk using url parameters method.
Note
The app is installed in several locations:
Conversation detail in the Dashboard Monitor panel
Conversation detail in the Agent Web Chat
In the Tiledesk App Store.
However, data that's available in some locations may not be available in others. For example, your previous requests accessed conversation data. Conversation data is available in apps running in the conversation sidebar but not apps running in the Tiledesk App Store.
Create a Tiledesk app
Now that you have your project, it's time to create your first app in the Apps menu:
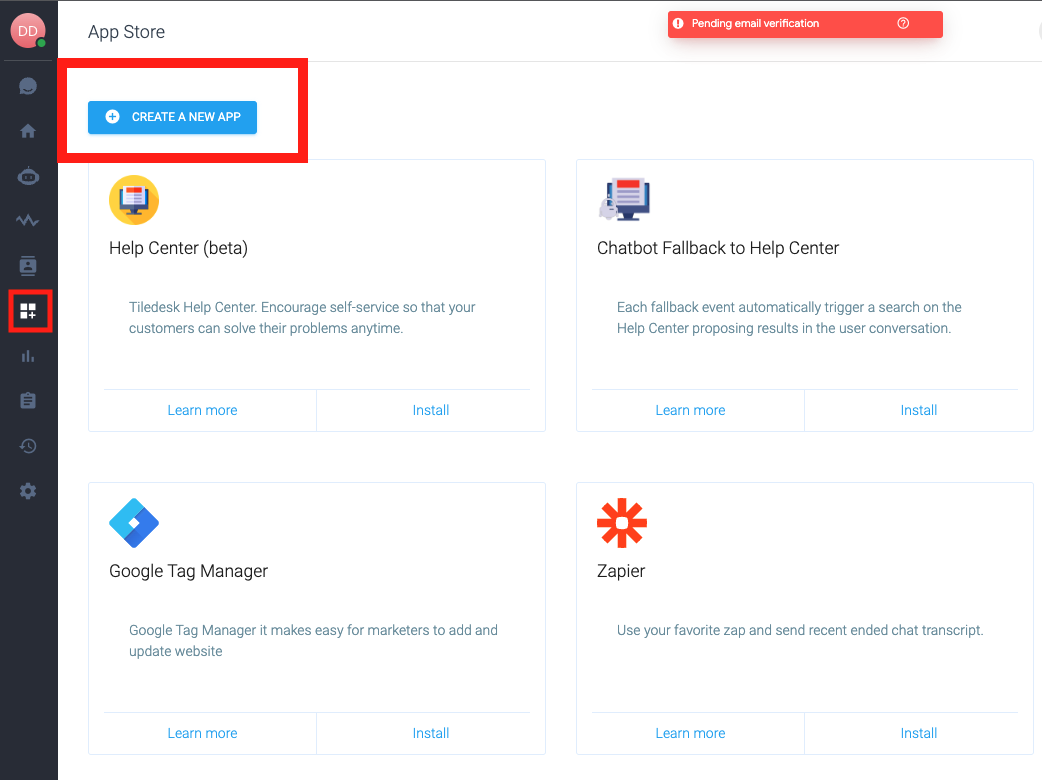
In Your Apps, click Create a New App button.
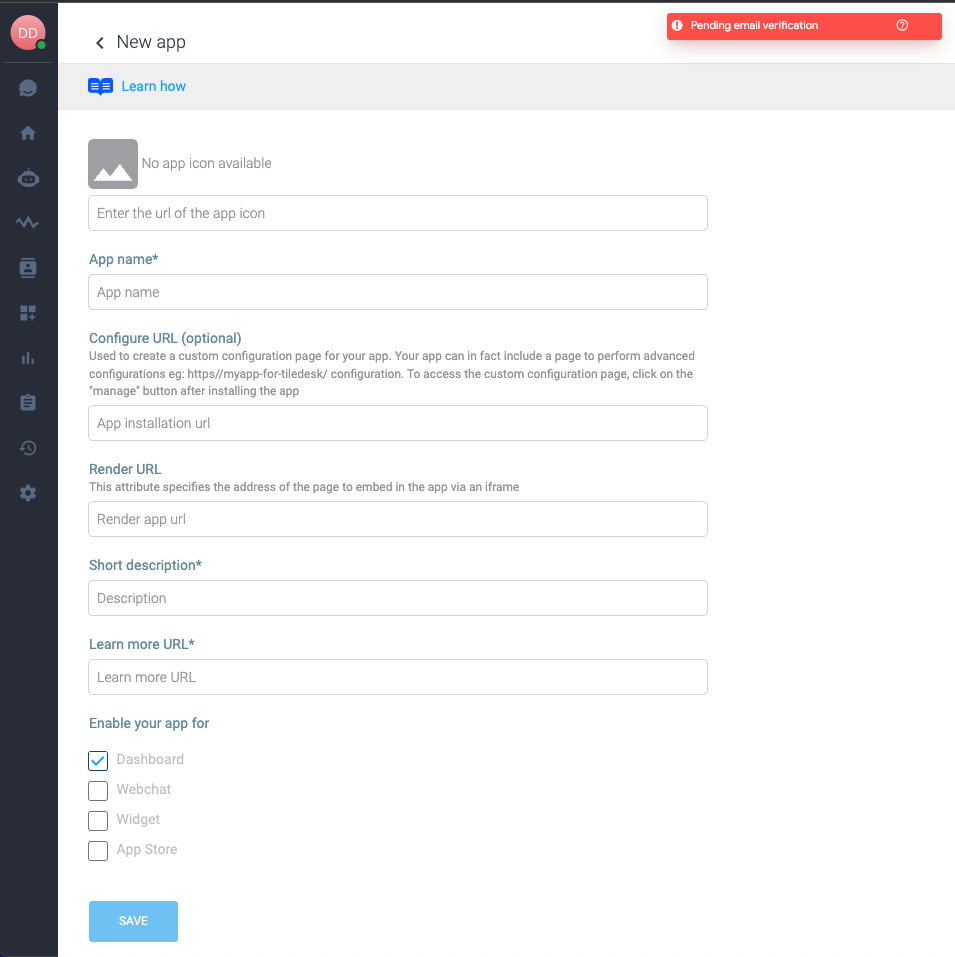
In the form panel insert :
The app icon of your app (required)
The name of your app (required)
The configure URL (optional). Used to create a custom configuration page for your app. Your app can in fact include a page to perform advanced configurations eg: https//myapp-for-tiledesk/ configuration. To access the custom configuration page, click on the "manage" button after installing the app
The Render URL (required): This attribute specifies the URL address of your webapp to embed via an iframe
The app short description (required)
The learn more URL (required)
Where you want your app to be available. Permitted values:
Dashboard: the app will be available in the conversation details panel of the dashboard
Webchat: the app will be available in the conversation details panel of the agent web chat
Widget: the app will be available in the home page panel of the widget (COMING SOON)
App Store: the app will be available in the Apps menu of the dashboard
Last updated