Widget protocol specs
This document describes the raw JSON protocol specifications used by external chatbots (and by Tiledesk itself) to send messages to the widget. You can use this protocol from an external chatbot to customize messages for your end-users. The JSON protocol allows you to discover what kind of content the widget supports, building enhanced chatbot replies for increased user experience that go beyond simple text messages, adding images, special buttons and interaction.
New features are costantly added to Tiledesk widget so take a constant reference to this section to keep yourself updated with all the supported widget messages, controls and media that can be rendered in widget messages.
Resources
For a live demo of all the supported features described in this document you can refer to this external chatbot project on repl.it that you can use as a showcase of all the wideget features
External-bot widget demo on Repl.it
You can also see a live demo of this chatbot on this tiledesk live page:
Text message
Sending a text to the widget (from your chatbot, or your generic chat client) really needs a minimal JSON. For example, if you want to send the "Hello" message use the following:
JSON
{
    text: "Hello"
}
You can also specify some options:
type field: optional. the value 'text' is the default one. Use this field to change the message type (e.g. 'image').
senderFullname field: optional, because Tiledesk knows who he is talking to. But this field is useful to set if you want to change the sender name for some reason.
Quick replies
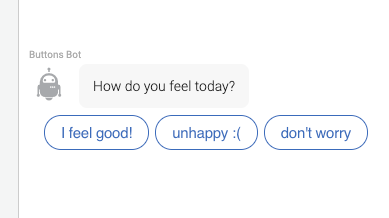
Quick Replies (generally sent by chatbots) allow users to quickly reply with a proposed, pre-build option. Pressing the button simply sends the text contained in the button label to the recipient (most of the time the chatbot) on the other side.
JSON
URL buttons
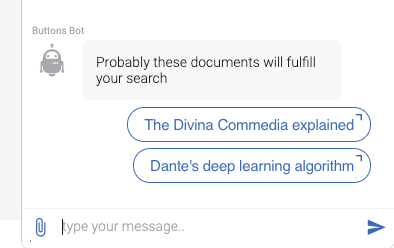
The URL button opens a link in a new browser tab, the same page hosting the widget or inside the widget itself.
A target option is used to specify where to open the URL content. It can have the blank, parent or self values. If a value is not specified it defaults to "blank".
Buttons of this type have a small arrow icon to help the user understand that tapping on a URL button will open a new window.
The self button is special because it opens the URL content directly inside a special frame of the widget itself. It as a slightly different arrow, pointing to the right orizzontally.
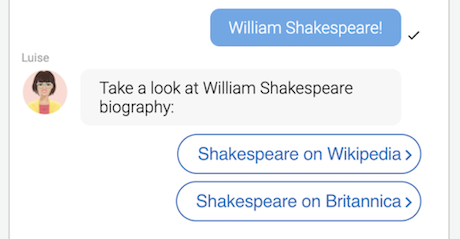
"self" buttons open the URL content in the "Widget frame" mode. In this mode the URL content appears into the same widget’s frame with a special header, showing the button title, a button to go back to the conversation and another button to open the content into a full browser window.
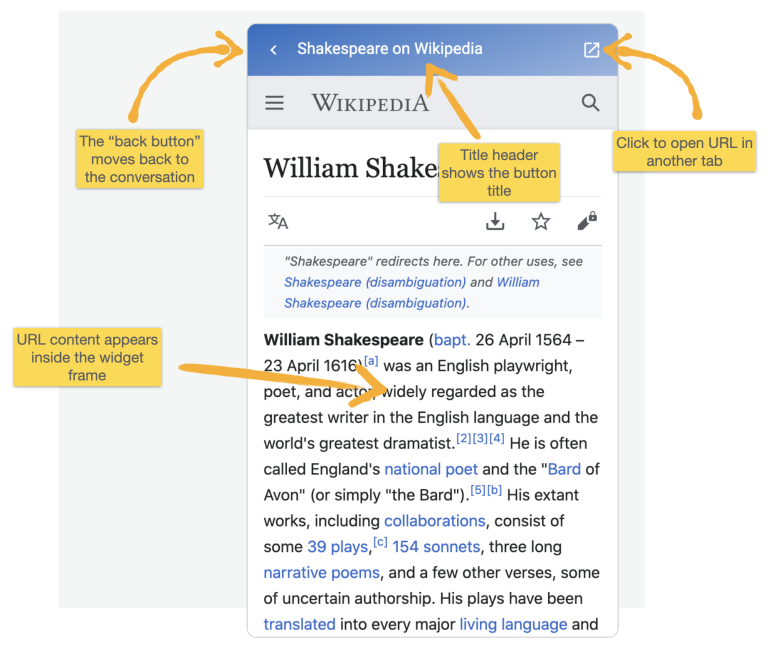
You can obtain the best results with "self" option if the content you are displaying plays good with the "responsive" mode, because of the small dimension of the widget makes it act with mobile-device-like responsiveness.
"blank" mode JSON
"parent" mode JSON
"self" (Widget frame) mode JSON
Action buttons
When a user presses an action button, an “action” message is sent to the chatbot. Your chatbot will receive the "action" field value that you can use to execute some specific actions. Upon receiving the action value, the chatbot can simply reply with a related-to-the-action reply message. If the show_echo option is set to true the widget will also show in the chat the message in the value field, giving evidence to the user that a real message was sent to the chatbot.
JSON
Action message (replied by the Widget)
This format is used by Tiledesk chat clients (e.g. Web Widget) to send a message that contains an action for the backend. The message can be hidden or not on the widget, it doesn’t affect the message behaviour. The backend that receives messages with the “action” field set in the attributes section can choose to take a corresponding action, then optionally reply to the same message. A button with an action message has the same aspect as the standard reply button, but with a different, longest and evident animation.
JSON
Image attachment
If you want to send an image from your external chatbot you should embed the image http source in the reply JSON schema shown below.
type field must be set to image
text field is optional
metadata.src field is mandatory and must point to a valid image
metadata.width and metadata.height fields are optional. If set they will reduce the image size accordingly in the reply message.
JSON
File attachment
If you want to send a generic document from your backend to the Tiledesk Widget you should embed the document file http source in the reply JSON schema shown below.
type field must be set to file
text field is optional
metadata.src field is mandatory. It must be a valid http url containing the document binary file
metadata.name field is optional. It's the file name
metadata.type field is mandatory. It must be a valid http content-type value representing the binary type of the document
JSON
iframe content messages
You can send content to the web widget that can be easily embeddable into an HTML iframe. For example you can send a youtube video, an external map, and also a mini HTML5 video game!
type must be set to 'frame'
text is optional.
metadata.src is mandatory and must point to a valid http content embaddable into an HTML5 iframe
metadata.width and metadata.height are optional. If set, they will reduce the iframe size accordingly in the reply message.
JSON
Disable the reply textbox
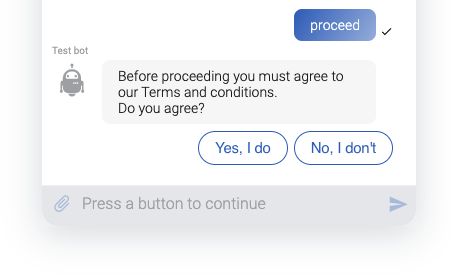
You can temporarily disable the user input textbox. This feature is useful, for example, when you provide a set of reply buttons and you want the user to press one of these buttons to continue the conversation.
attributes.disableInputMessage if true the reply textbox is disabled
attributes.inputMessagePlaceholder if set the reply textbox placeholder is replaced by this text. Used only when attributes.disableInputMessage is true
JSON
To disable the reply textbox set the above properties in the attributes section, as in the following example:
In the following image, the input textbox is disabled, until the next message arrives.
Update user metadata
Sometimes, while interacting with the chatbot, you can ask the user to update his info like his fullname. In this case the widget provides special attributes to update his user info, so he can send new messages with the correct user fullname. You can update user's fullname and email using the following message's properties:
attributes.updateUserFullname: Use this attribute to update the Widget's new user full name
attributes.updateUserEmail: Use this attribute to update the Widget's new user email
JSON example
Once the Widget's receives a message with these attributes it will use the updated fullname and/or email in all subsequest messages.
Hidden messages
Sometimes it's useful to send messages hidden to end-users. For example, if some message should trigger a chatbot message without the user see the actual "question" that triggered that reply.
To hide messages to the widget you can use "info" messages. All info messages are hidden to the end-users, but keep in mind that info messages are always visible in teammate chat, as in the following example.
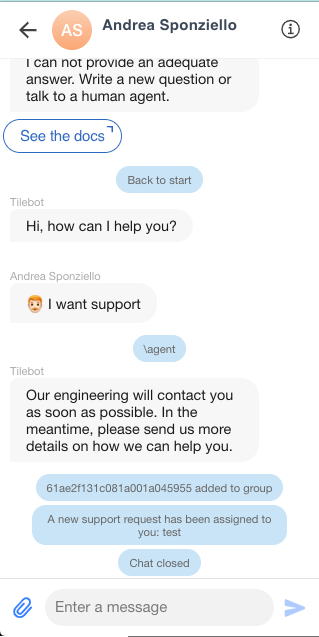
attributes.subtype set to "info". Hides the message to the end-user channels (Widget, whatsapp, Telegram, Facebook etc.)
JSON
Triggers a chatbot to start a conversation. This message is hidden in the end-users channels:
Splitted messages
It's a common trend to break long chatbot messages in multiple messages. This can happen on the server side, but there are some issues with this approach, like sometimes unwished unordered messages in the conversation, client "live" reordering (this happens because Tiledesk cannot assure that "very timestamp near" messages arrival order is preserved in the long "message delivery chain".
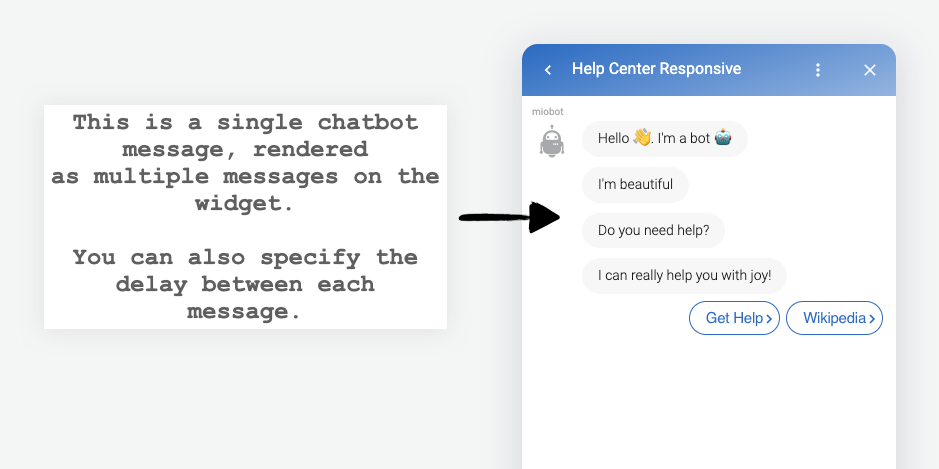
In this cases the "Widget side" splitting is a preferrable approach. You can send all the messages in a single "packet" to the Widget, specifing the "delay" between them. It will be the Tiledesk Widget to render the messages in the exact order, preserving the exact timing between the messages.
Let's look at an example:
Suppose you want to send these messages as a unique chatbot message, but splitted in multiple messages:
JSON
You have to send a single message like the following:
As you can see from the example above, the effective message is splitted in the attributes.commands section of the message JSON payload.
The commands are alternated. Each command has a "type" property.
type: 'message' is an effective message. It carries an effective complete 'message' - message property, json payload, look at the example above - the real message (a splitted piece of the orginal one) you wish to display.
type: 'wait', it specifies a delay - time property, a number, milliseconds, look at the example above - for the next message to display
Hope you enjoy to split messages like Tiledesk does! :)
HTML messagees
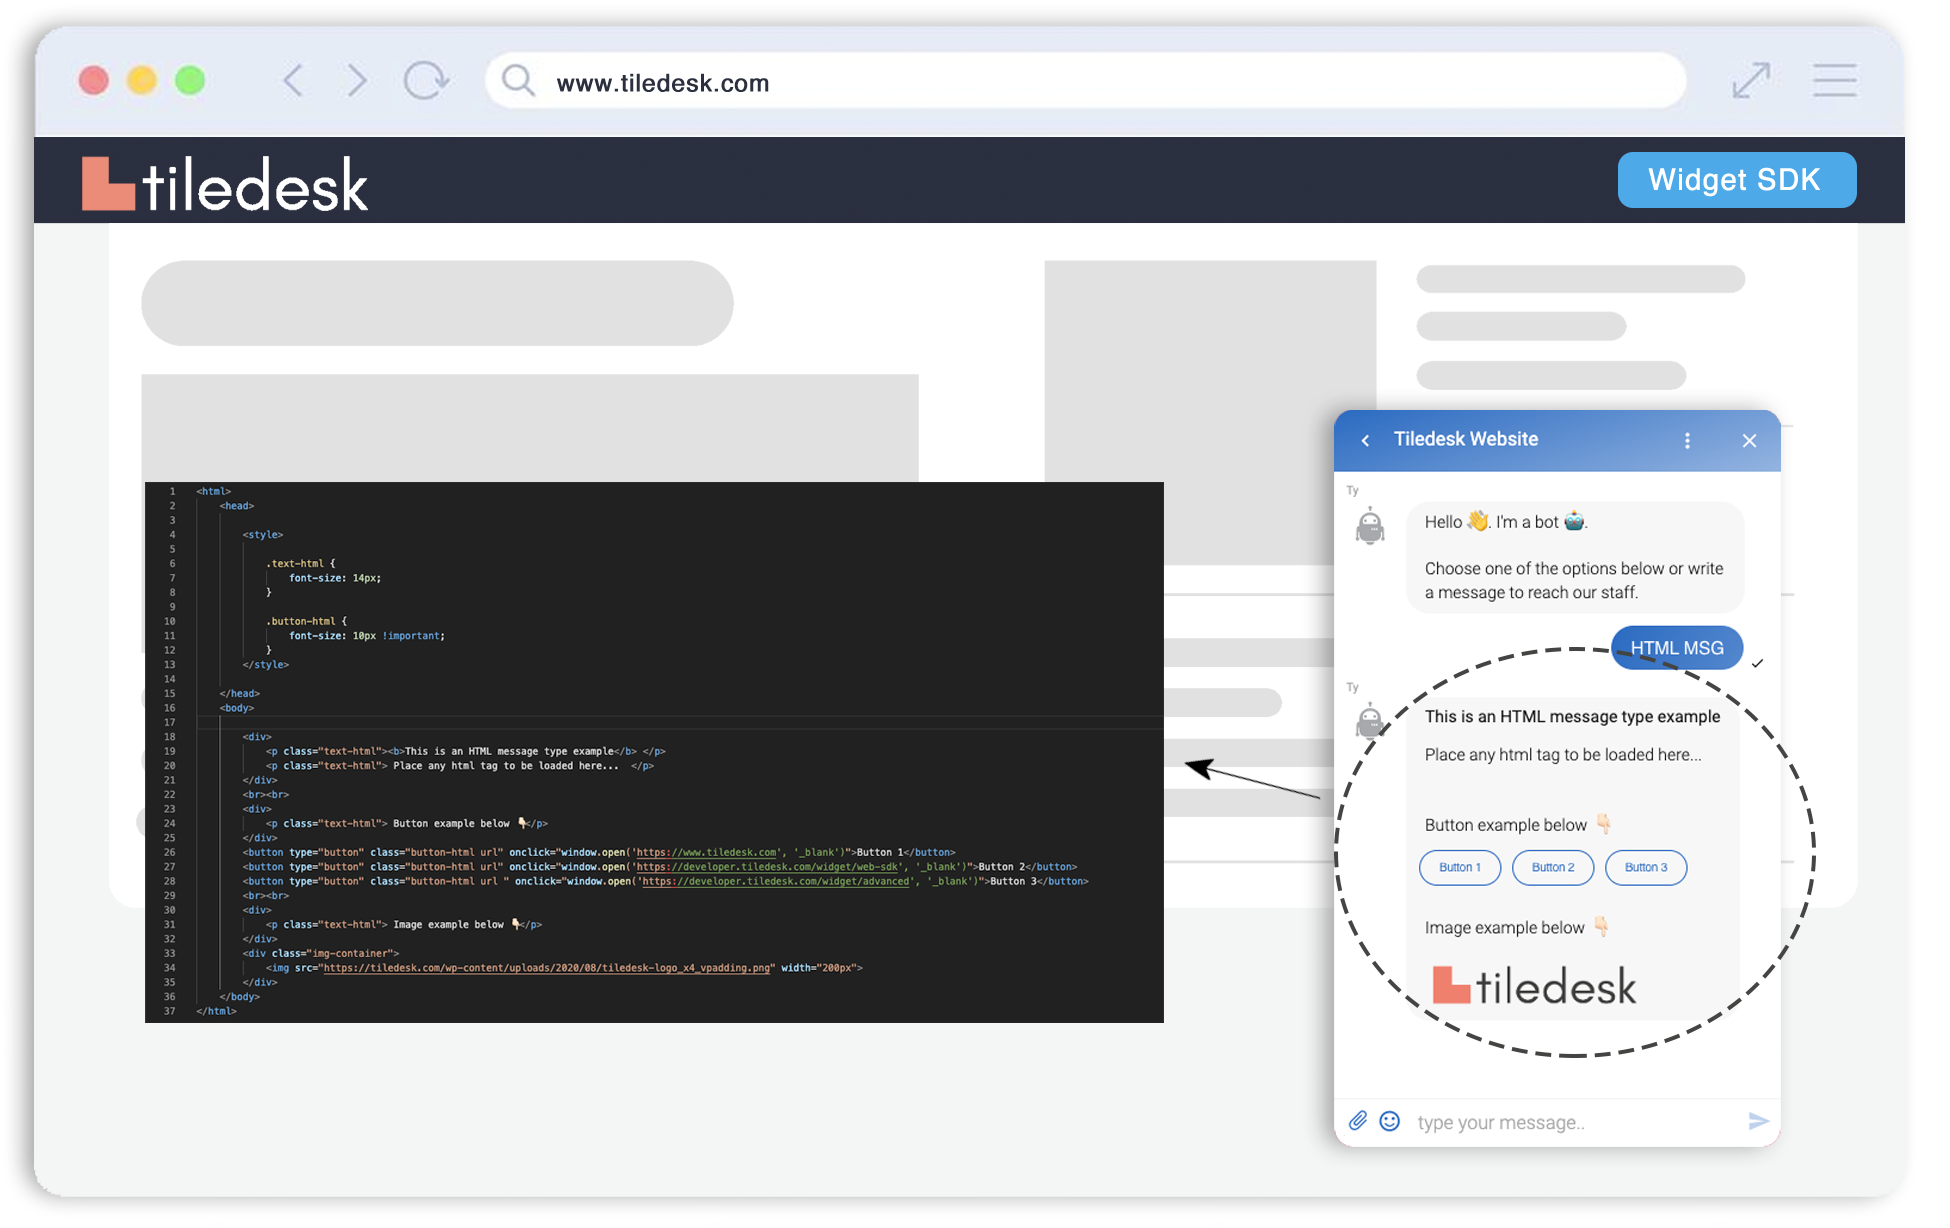
The widget is able to receive messages containing html tags and render them within the conversation. To do this, server-side the developer should value the type field of the message object with 'html' and insert in the text field the HTML code that you want to show on the widget.
Furthermore, the widget is currently capable of supporting link buttons as well.
Below is a practical example of an HTML message and its rendering inside the widget.
JSON
Below we present an example of message json object with html message type
As specified in the example presented, it is also possible, like a normal HTML page, to specify the style inside the <style></style> tag.
The widget inside renders three types of styles, assigned respectively to the css classes text-html, button-html and image-container.
The example shows an override of these css classes in order to customize the style of the elements as desired.
Last updated