Prechat Form JSON specs
Prechat Form JSON specs
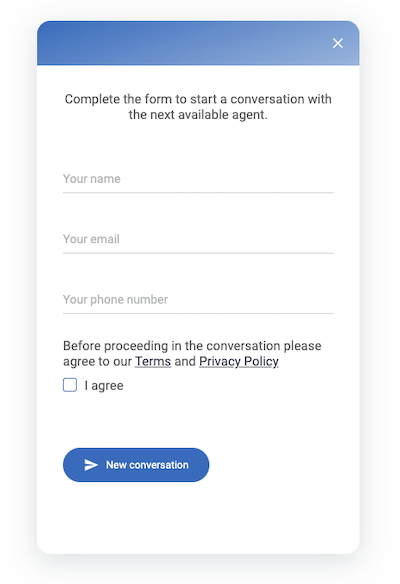
Table of contents
Introduction
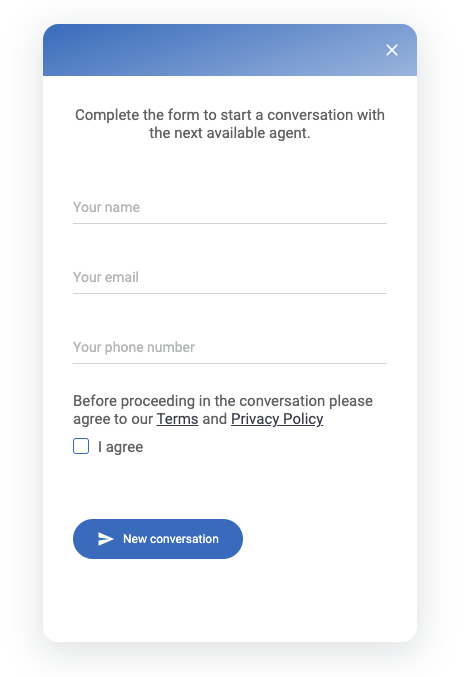
The Prechat Form is used to collect some end-user data before starting a conversation. Generally this info are asked to guests users, because of authenticated users already providing some "certified" information into a custom JWT. The info collected by the Prechat Form will be used either by Agents, by the Tiledesk platform itself or by developers trough APIs.
The prechat form is asked just once to the user, on the first conversation. Once filled and submitted the form data is saved in the browser Local Storage database. If the user wants to fill the prechat form again after the first submission he must "logout" from the widget. This will also change his anonymous user ID.
To logout and reset the widget status, press the option menu (gear icon) in the bottom left corner of the widget home screen and click "logout".
Default Prechat Form
To activate the prechat form, got to the Tiledesk Dashboard, then Settings > Widget > Prechat form (section). Open this section and activate the form through the provided switch:
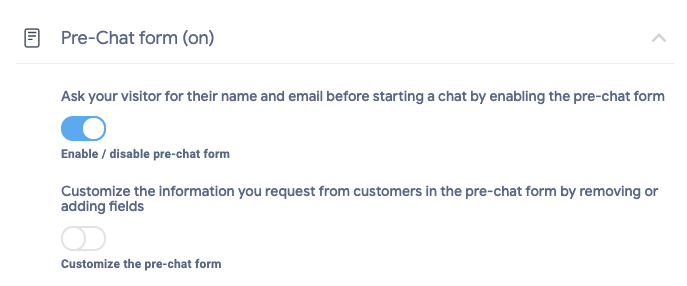
If you activate the Prechat Form and no custom format is specified, the default form is shown before starting any conversation. The default form asks the basic info necessary to interact with a Guest user: email and a fullname.
For the default prechat form, useremail and fullname are required fields.
Custom Prechat Form
The prechat form provides customization, so if email is not enough you can ask a telephone number or you can make the user agree to your terms and conditions before proceeding with a conversation. Custom forms use a special (and easy) JSON syntax to customize the form fields. You can specify the fields type choosing the right "control type" (i.e. text/textarea, checkbox, static text etc.). You can also provide some options, useful to validate the field, show a custom validation error or make the field mandatory or not. Multilanguage for labels is also supported.
Inspect filled-in user data
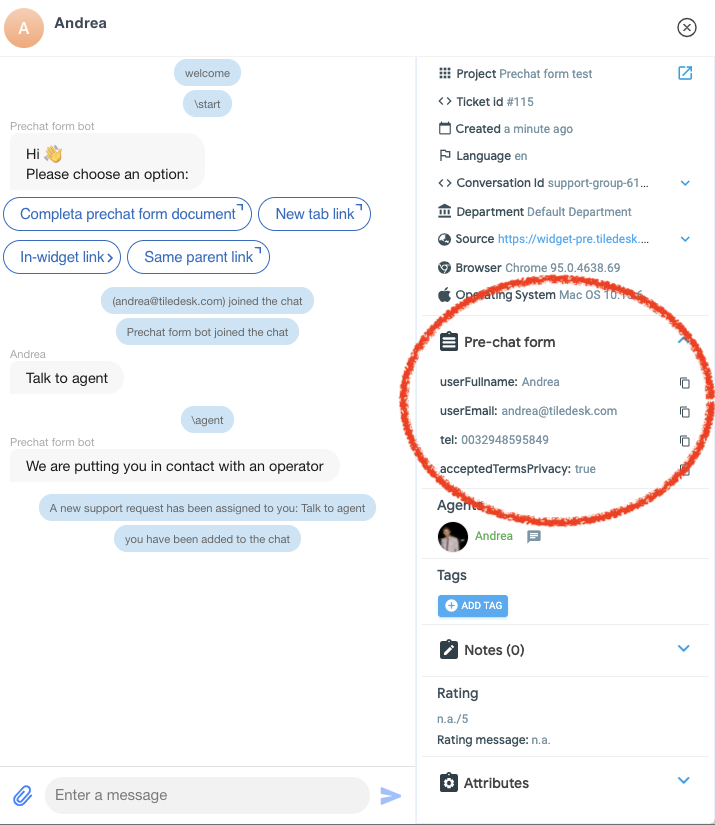
Once you fill the custom prechat form, the operator can find the filled-in user data in the dedicated section of the conversation detail. Suppose the user fills the custom form of Example 2 as in the following picture:
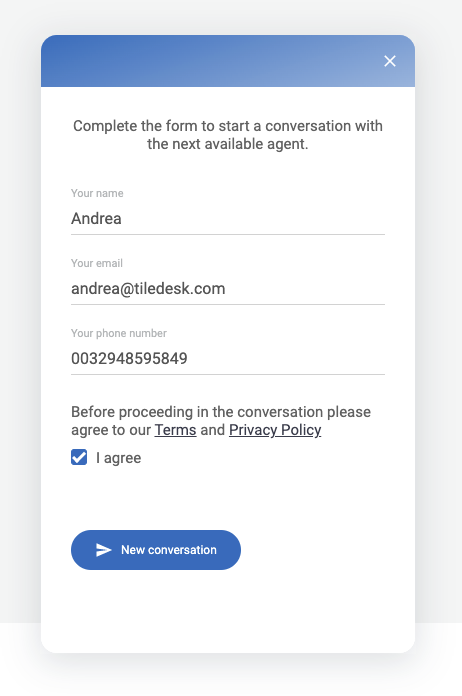
The operator can see the filled-in form data looking at the "Prechat form section" of the conversation detail, as in the following picture:
Examples
To understand how prechat form works we can start with some examples.
These examples will show how to accomplish some common tasks with the prechat form. We will start asking the user's telephone number. In the second example we'll propose to read & accept a Privacy Policy and finally, in the third example, a form will ask the user to fill the first question in order to proceed to a new conversation.
Example 1: ask the telephone number
In this first example we'll show you how to ask the user telephone number in addition to email and fullname. To customize the prechat form, first sign in the Tiledesk dashboard using your credentials, then choose a project (if you have more then one). Move to the widget section, scroll down to the prechat form section and enable the prechat form using the switch.
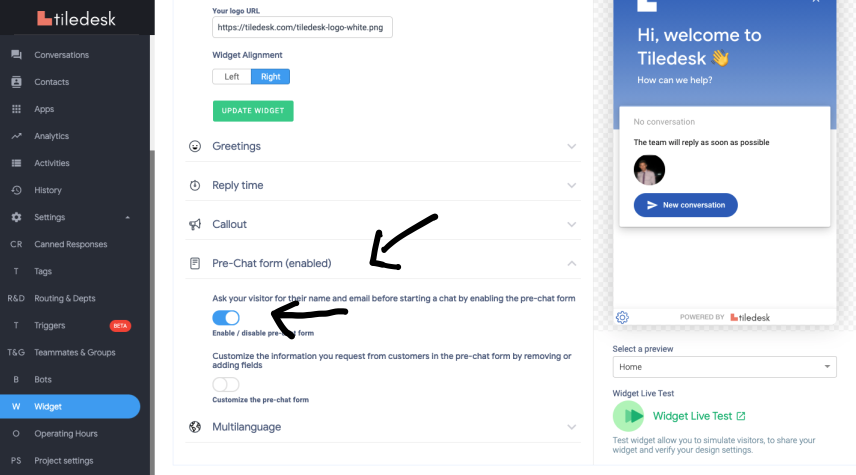
Now activate the custom form editor using the switch, as in the following figure:
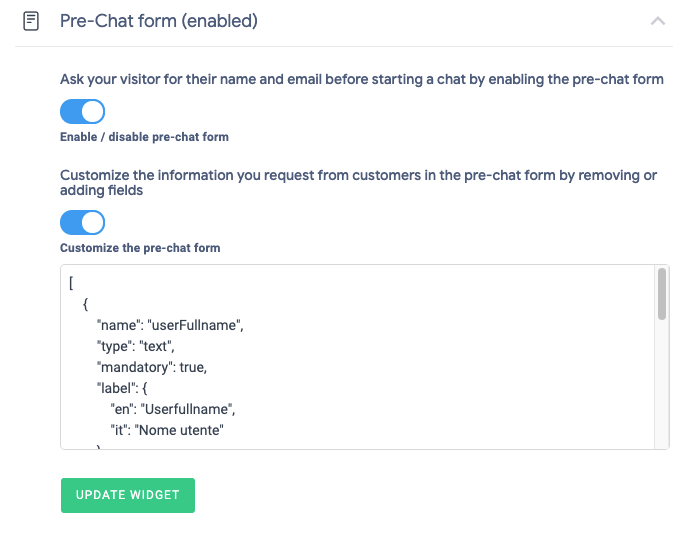
You will see the JSON source for an already provided example.
Please replace the provided JSON with the following code:
Now save the pasted source pressing the UPDATE WIDGET button.
On the top bar, press the green button to open the widget. Now Start a conversation.
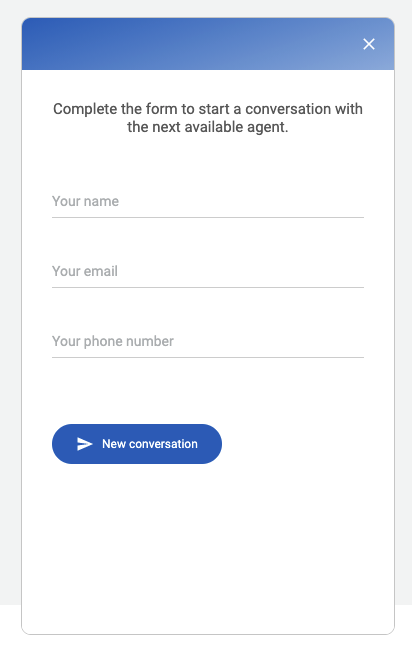
NOTE: If you don't see the prechat form after starting a conversation, don't panic. You probably already submitted the prechat form. Open the option menu (gear icon) in the bottom left corner of the widget home screen and select "logout". On the next conversation start the form will appear again.
We just added a phone number text field to the basic form. As you can guess, the form JSON is an array of "controls". Each control has some attributes that allow to fine tuning the control itself. In this case the first two elements (controls) of the array are a "name" textfield and an "email" textfield. We just focus on the added one, the phone number. The phone number is mandatory (mandatory attributes set to true) and we set a couple of multilanguage labels, to show you how multi-language is supported using the languages iso codes (en, it) of the desired languages (English and Italian in this example, respectively).
Reserved fields names: While choosing the controls "name" attribute, keep in mind that there are some reserved Tiledesk names: userEmail, userFullname and firstMessage. We discuss about those fields here
Example 2: accepting Privacy and ToS
In this example we'll add an option for the user to proceed in the conversation only if "You accept our Terms and Conditions and Privacy Policy". We will add a couple of controls: 1. Static text to show the notice, 2. Checkbox to declare acceptance. We can modify the JSON for the Example 1, adding the new controls:
Please replace the provided JSON with the following code:
Now save the pasted source pressing the UPDATE WIDGET button.
On the top bar, press the green button to open the widget. Now Start a conversation.
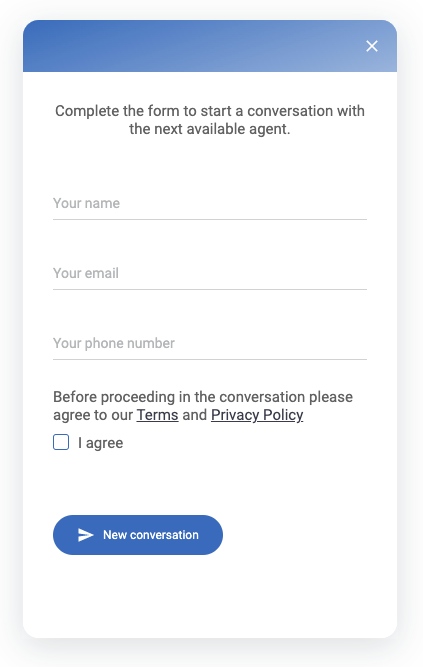
As you can see the new controls are shown on the footer. If you try to proceed without accepting, the form will block you.
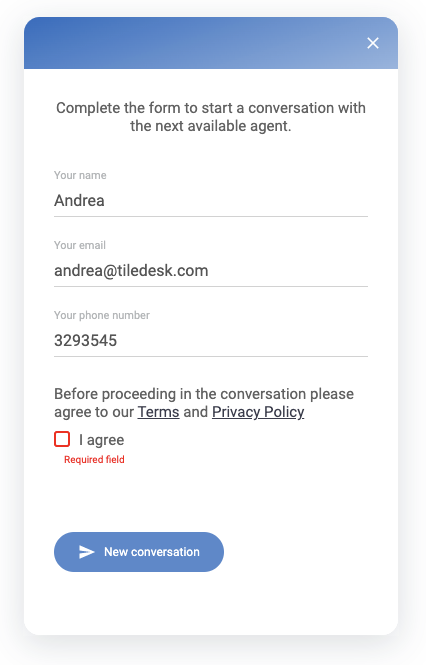
Now check the option to accept the Terms of use and proceed with the conversation 😅
Example 3: ask the first message
In this example we'll add an option for the user to write the first message before starting a conversation. This option is extremely useful when you don't have a chatbot and you want your agents get in contact with a great first message from the end-user, that exactly describes the problem. Note that with this special field (that uses for the "name" property the reserved value "firstMessage") the widget instantly sends the message to Tiledesk. We will add a new textarea control with firstMessage as the value of the name property. This will tell Tiledesk to use this value as the first message of the conversation. We can modify the JSON for the Example 1, adding the new textarea control:
Now save the pasted source pressing the UPDATE WIDGET button.
On the top bar, press the green button to open the widget. Now Start a conversation.
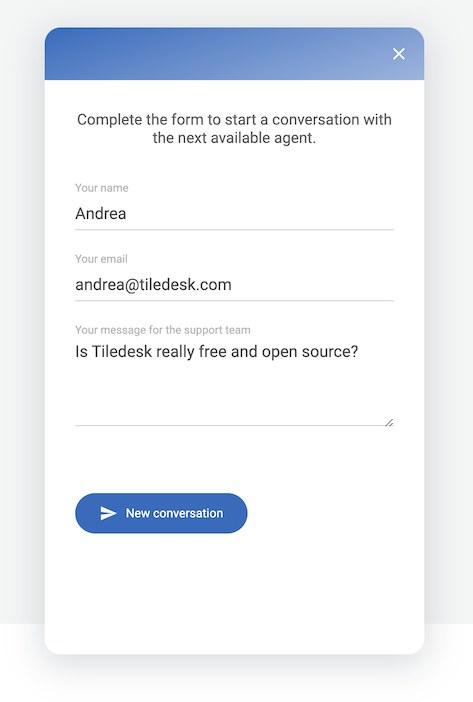
You can see the new control, "Your message for the support team", shown as the last one. It's a mandatory field, you must fill it or the form will block you.
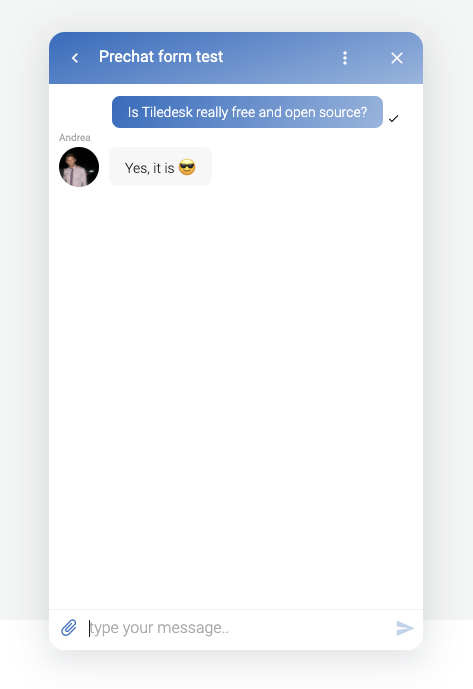
As soon as you fill the form, the new conversation starts, with the first message appearing as the first one of the conversation. The agent (or the chatbot) will receive it and happily reply 😎
Control types
Here follows a list and a description for all the control types actually supported by the Tiledesk prechat form.
Text
This is the default control, it's a simple text field. When type is omitted a Textfield control is rendered. You can provide a regex to validate the field.
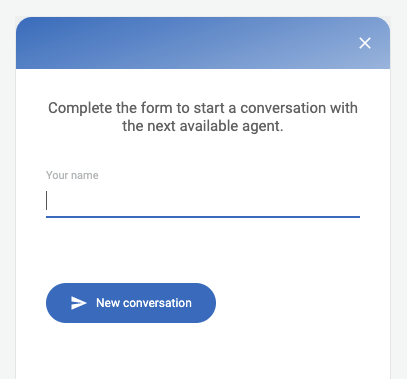
Example:
Text - Format specification
name attribute
mandatory
Example:
Reserved names
While choosing the controls "name" attribute, keep in mind that there are three reserved Tiledesk names:
userEmail It's the email used by Tiledesk to send automated messages.
userFullname When available it is used to identify the user by his fullname around Tiledesk.
firstMessage When provided, this value is used as the first message sent by the Widget as soon as the conversation starts.
type attribute
optional, case insensitive
For Textfield use text value.
mandatory attribute
optional, boolean
This property denotes if is mandatory to have a value for this control.
“mandatory”: true | false
Default is false
If true filling some text is mandatory.
value attribute
optional
The pre-defined value for the field.
regex attribute
optional
If set, the field value will be validated with this regex.
Example:
label attribute
optional
This is the control's label. Multilanguage is supported. Simply add the language's ISO code as in the following example to add languages. If no supported language is found, the "default" label value will be used.
If label attribute is not configured, the “name” attribute is used as the control's label. If the label's property value is a string (not a JSON object with ISO language value) the translation is searched in Tiledesk translations using the label's string property as the key for the translation.
Ex. label as string "email" will use the Tiledesk translation key "email".
errorLabel attribute
optional
If available the errorLabel will be displayed if the regex doesn't match. If not set the standard message is displayed.
Textarea
Textarea is a multi-line text input. Use "textarea" value for "type" property to render a Textarea. You can provide a regex to validate the textarea input text. Use the optional property "rows" to render a specific number of initial rows.
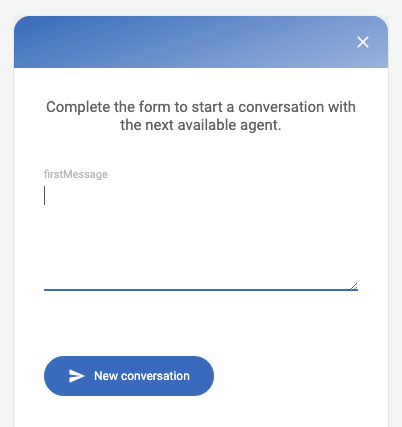
Example:
Textarea - Format specification
name attribute
mandatory
Example:
Reserved names
While choosing the controls "name" attribute, keep in mind that there are three reserved Tiledesk names:
userEmail It's the email used by Tiledesk to send automated messages.
userFullname When available it is used to identify the user by his fullname around Tiledesk.
firstMessage When provided, this value is used as the first message sent by the Widget as soon as the conversation starts.
type attribute
optional, case insensitive
For Textarea use textarea value.
mandatory attribute
optional, boolean
This property denotes if is mandatory to have a value for this control.
“mandatory”: true | false
Default is false
If true filling some text is mandatory.
value attribute
optional
The pre-defined value for the field.
regex attribute
optional
If set, the field value will be validated with this regex.
Example:
label attribute
optional
This is the control's label. Multilanguage is supported. Simply add the language's ISO code as in the following example to add languages. If no supported language is found, the "default" label value will be used.
If label attribute is not configured, the “name” attribute is used as the control's label. If the label's property value is a string (not a JSON object with ISO language value) the translation is searched in Tiledesk translations using the label's string property as the key for the translation.
Ex. label as string "email" will use the Tiledesk translation key "email".
errorLabel attribute
optional
If available the errorLabel will be displayed if the regex doesn't match. If not set the standard message is displayed.
rows attribute
optional
'rows' property specifies the initial number of rows of the Textarea control.
Checkbox
Checkbox represents an HTML checkbox. Use "checkbox" value for "type" property to render a Checkbox. It can only assume two values, 'checked' and 'unchecked'. Use "checkbox" value for "type" property to render a Checkbox.
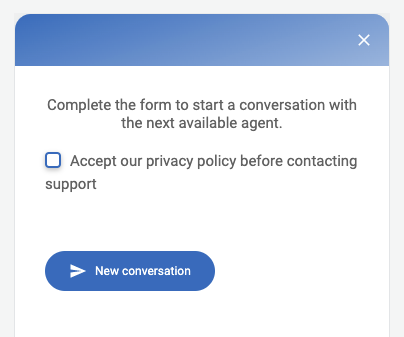
Example:
Checkbox - Format specification
name attribute
mandatory
Example:
Reserved names
While choosing the controls "name" attribute, keep in mind that there are three reserved Tiledesk names:
userEmail It's the email used by Tiledesk to send automated messages.
userFullname When available it is used to identify the user by his fullname around Tiledesk.
firstMessage When provided, this value is used as the first message sent by the Widget as soon as the conversation starts.
type attribute
optional, case insensitive
For Checkbox use checkbox value.
mandatory attribute
optional, boolean
This property denotes if is mandatory to have a value for this control.
“mandatory”: true | false
Default is false
In the case of checkbox this means that checking the box is mandatory.
value attribute
optional
The pre-defined value for the field.
label attribute
optional
This is the control's label. Multilanguage is supported. Simply add the language's ISO code as in the following example to add languages. If no supported language is found, the "default" label value will be used.
If label attribute is not configured, the “name” attribute is used as the control's label. If the label's property value is a string (not a JSON object with ISO language value) the translation is searched in Tiledesk translations using the label's string property as the key for the translation.
Ex. label as string "email" will use the Tiledesk translation key "email".
Static
Static type is simple text. Use "static" value for "type" property to render a Static block of text. You can use simple text or HTML to render more complex pieces of text.
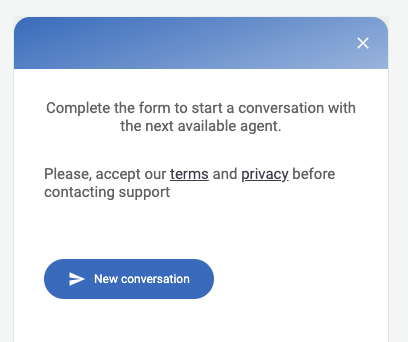
Example:
Static - Format specification
type attribute
optional, case insensitive
For Static use static value.
label attribute
optional
This is the control's label. Multilanguage is supported. Simply add the language's ISO code as in the following example to add languages. If no supported language is found, the "default" label value will be used.
If label attribute is not configured, the “name” attribute is used as the control's label. If the label's property value is a string (not a JSON object with ISO language value) the translation is searched in Tiledesk translations using the label's string property as the key for the translation.
Ex. label as string "email" will use the Tiledesk translation key "email".
Last updated