Hello World tutorial
Connect your own chatbots to Tiledesk
Hello World tutorial for external chatbots integration
Tiledesk is designed to allow external chatbots to easy communicate with your Agents or End users. Once a chatbot receive an authentication token from Tiledesk he can easily call many APIs to modify the state of a Request (the support conversation) changing Departments, inviting Agents, sending scheduled messages, use the chatbot microlanguage to simplify interaction with buttons, images, messages' timing etc.
This tutorial will show how to create a very basic chatbot integration, allowing you to reply to specific messages sent by the End user.
Signup a user on Tiledesk
To use Tiledesk APIs or integrate your own chatbots is mandatory to signup a new user on Tiledesk. Then go to the console, available on the following link https://panel.tiledesk.com/v3/dashboard
After signup please follow the proposed wizard to create your first Tiledesk project (for this tutorial you can jump the last step, relative to the widget installation).
As soon as you create the project you will be redirected to the project home.
To integrate an external bot, we'll need a web endpoint where all the chatbot's requests will be forwarded. We'll use the well-known Repl.it service to fast create our own web endpoint.
Create and configure external chatbot endpoint
Go on the repl.it and press "+ new repl" button. Then select Node.js as the programming environment and choose a unique name of you repl propject. We used tiledeskbot.
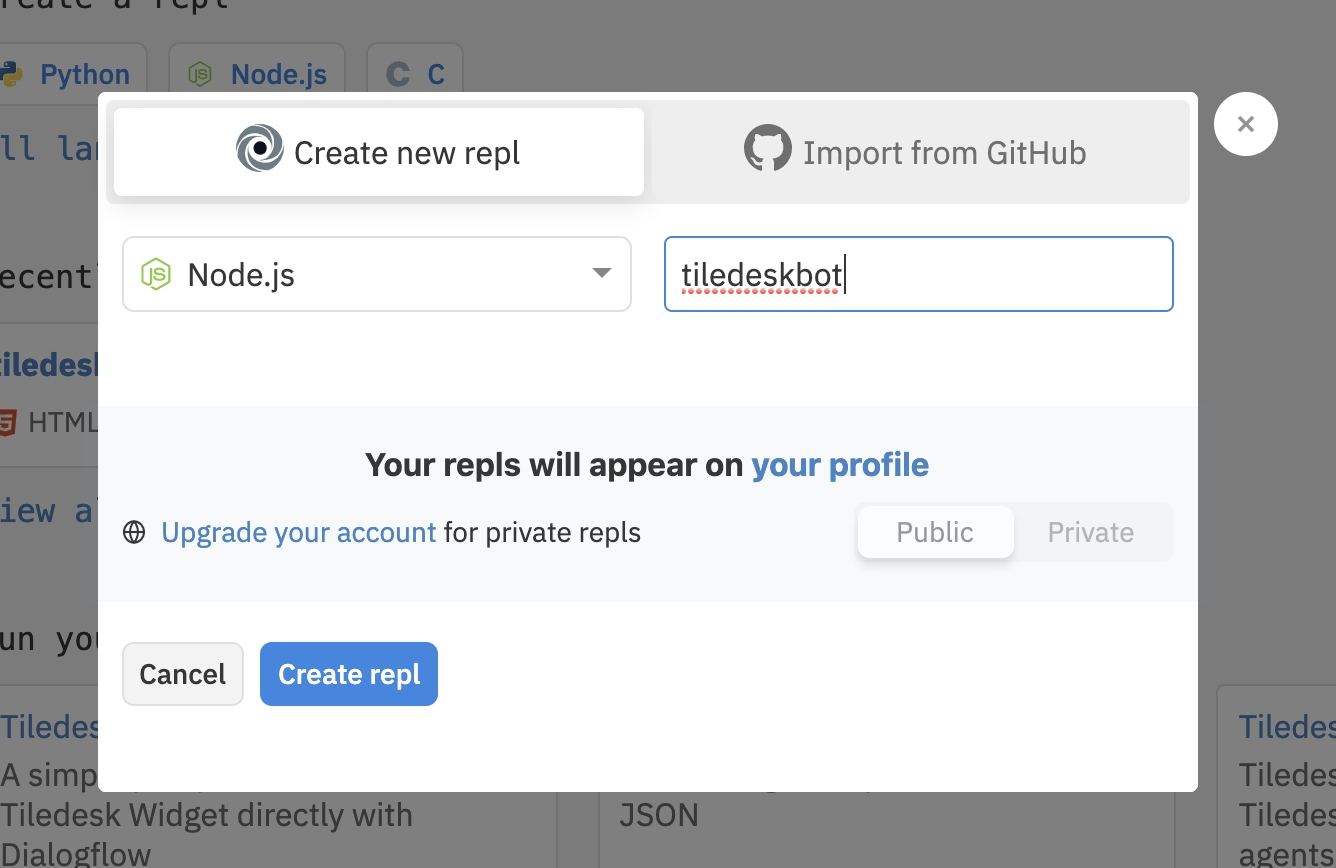
Presse "Create Repl". Your initial source code will be generated, a empty index.js file, as the following:
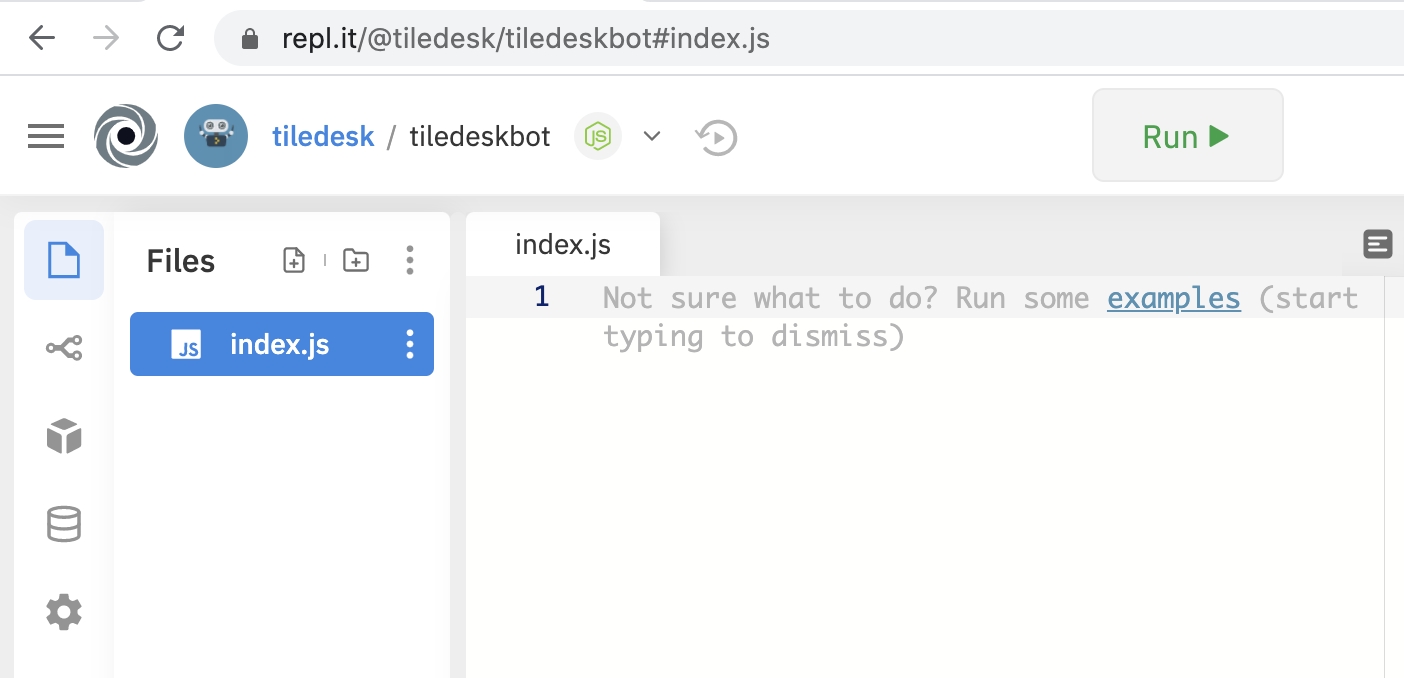
Hint We'll use Node.js for this example, due to his simplicity, low cost hosting and low learning curve. But keep in mind that the concepts in this tutorial can be easily applied to every web framework of your choice.
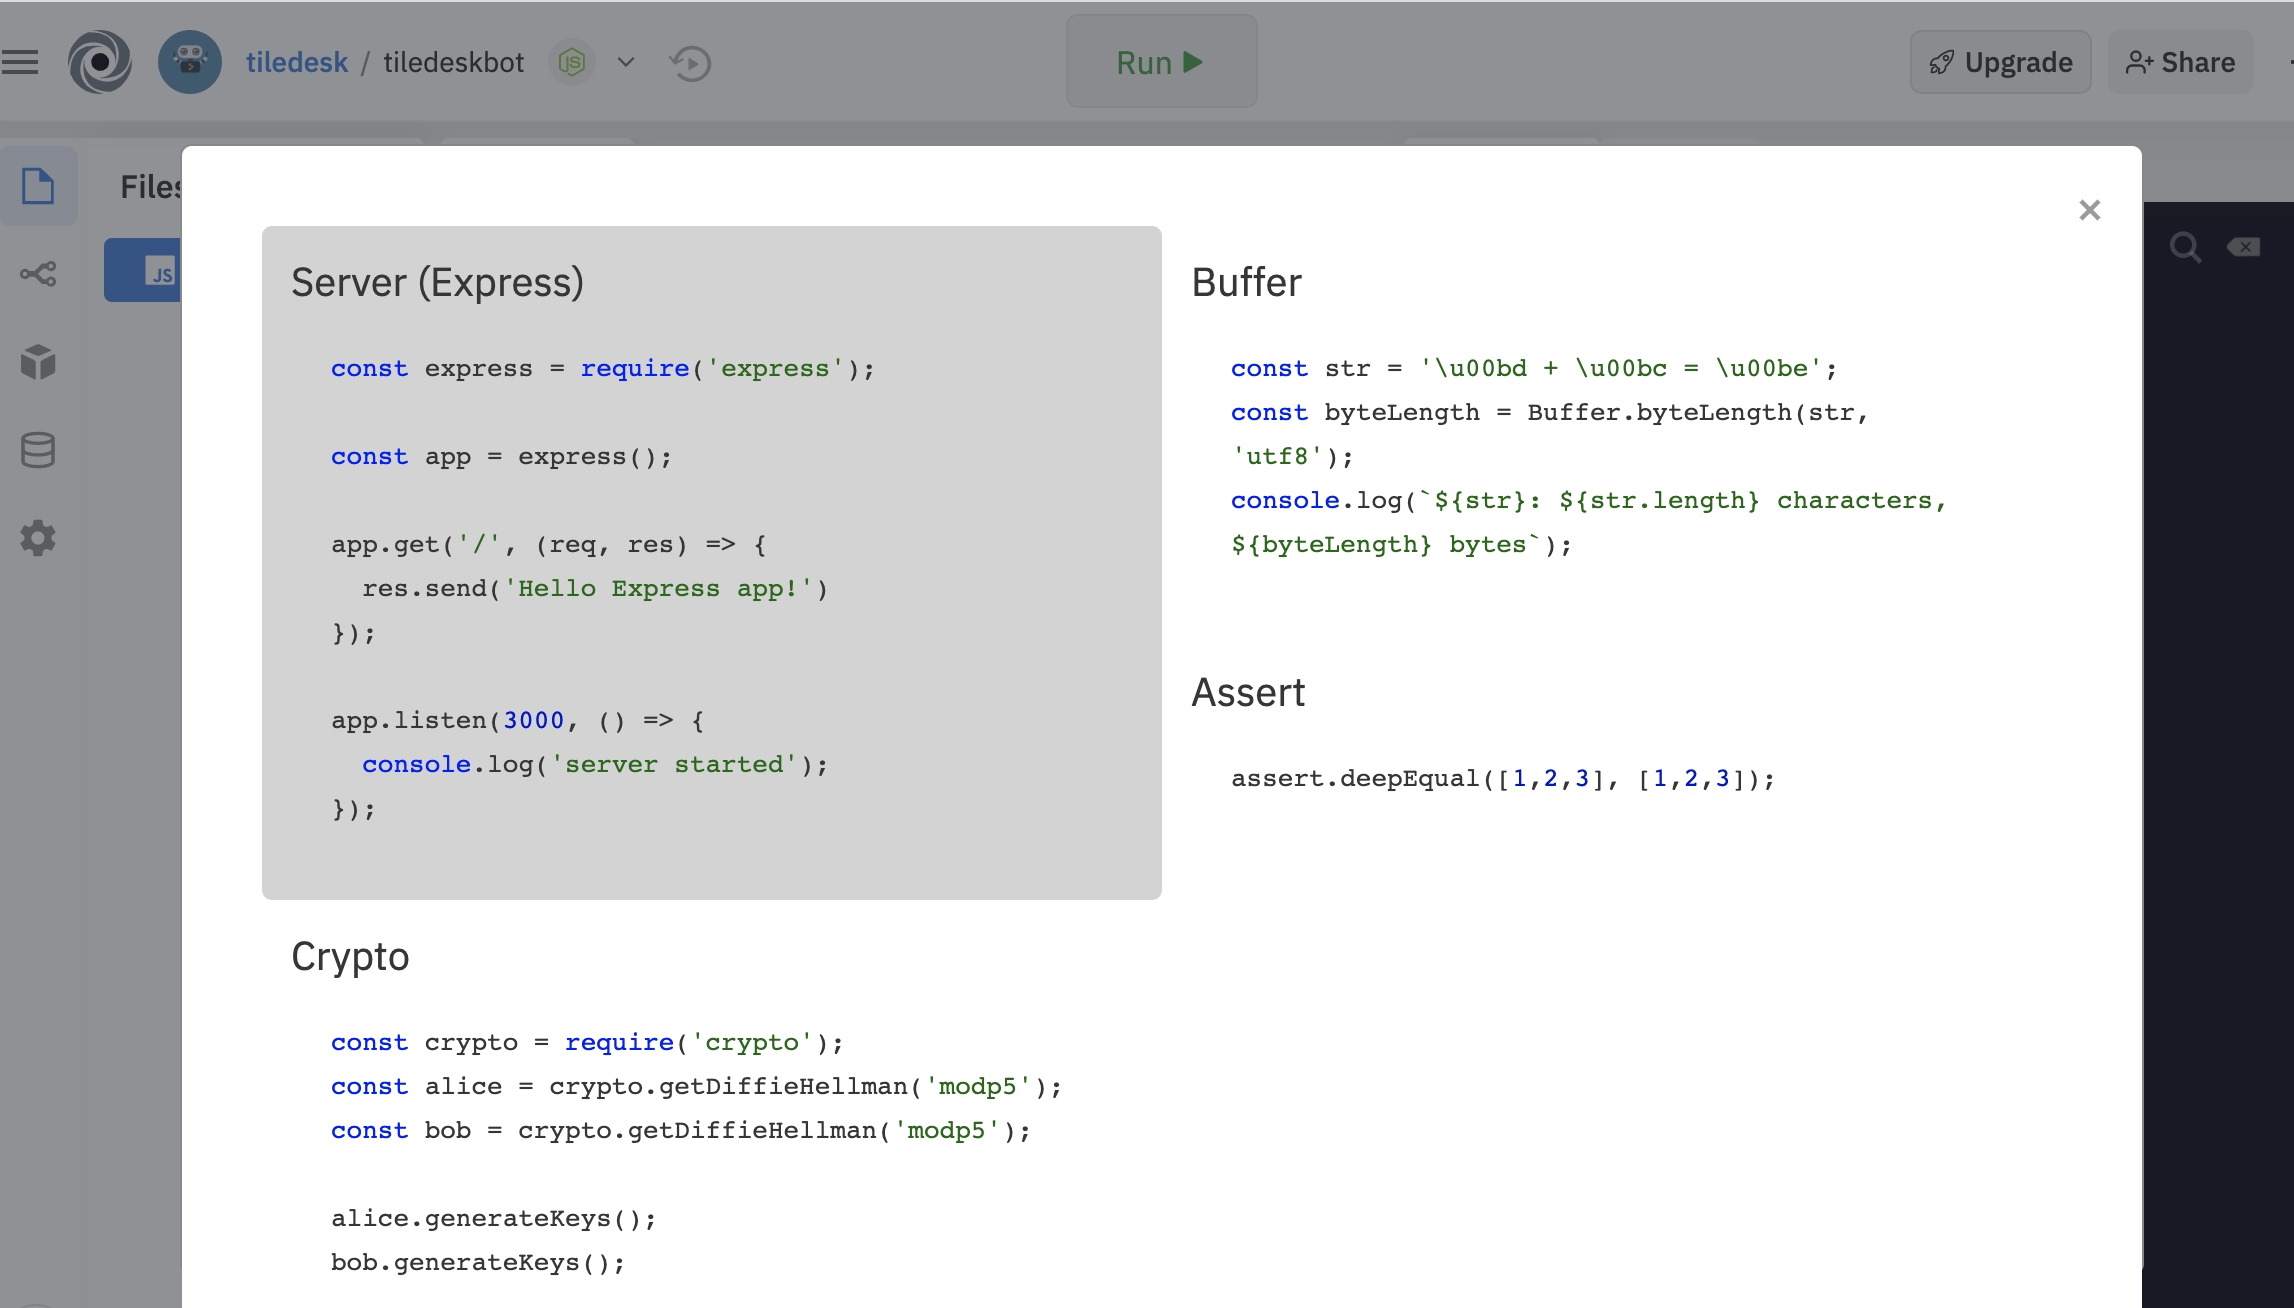
Now press the "examples" link in index.js file, then select the "Server (Express)" option, as in the following figure:
Now we can add a new HTTP method POST to our web application, lets call this /bot. The new source will look like this:
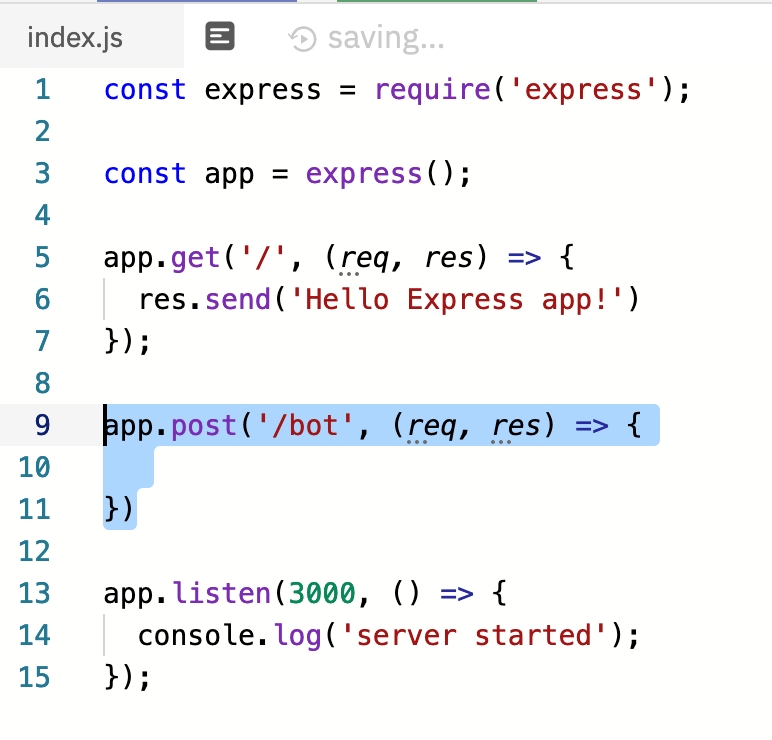
Snippet source:
const express = require('express');

const app = express();

app.get('/', (req, res) => {
  res.send('Hello Express app!')
});

app.post('/bot', (req, res) => {
  res.send('Bot in progress...');
});

app.listen(3000, () => {
  console.log('server started');
});
Press "Run" on top to start the server, then you can reach this url using the full address (with HTTP POST method):
https://tiledesk-helloworld-chatbot-tutorial.tiledesk.repl.co/bot
This url is the external bot endpoint. We'll use this later.
Now move back to the Tiledesk project console and open the Settings menù on the left panel of our Tiledesk project, selecting the Bots option:
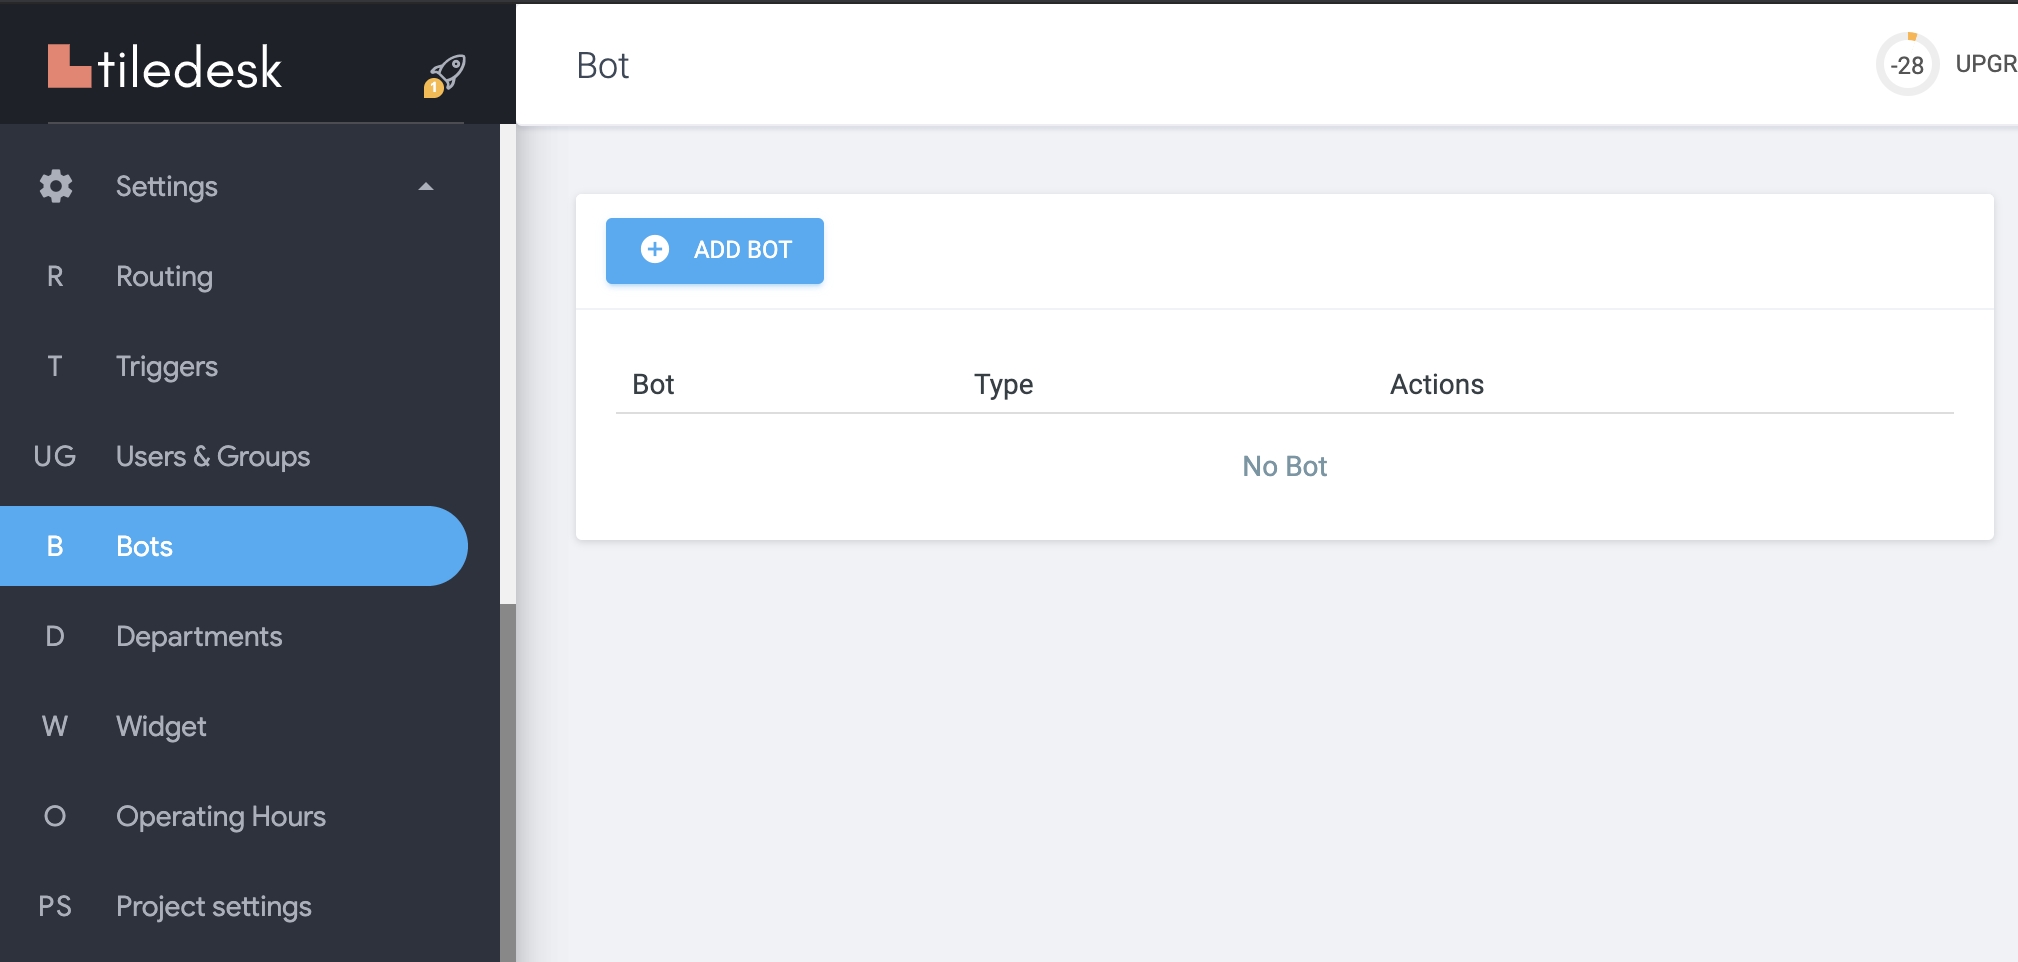
Press the ADD BOT button, to create your own external bot. Choose the "External" option.
We must chose a name for the bot and placing in the Url field the external bot endpoint url of the repl app we created above:
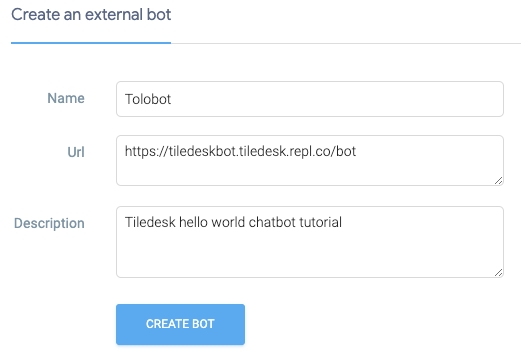
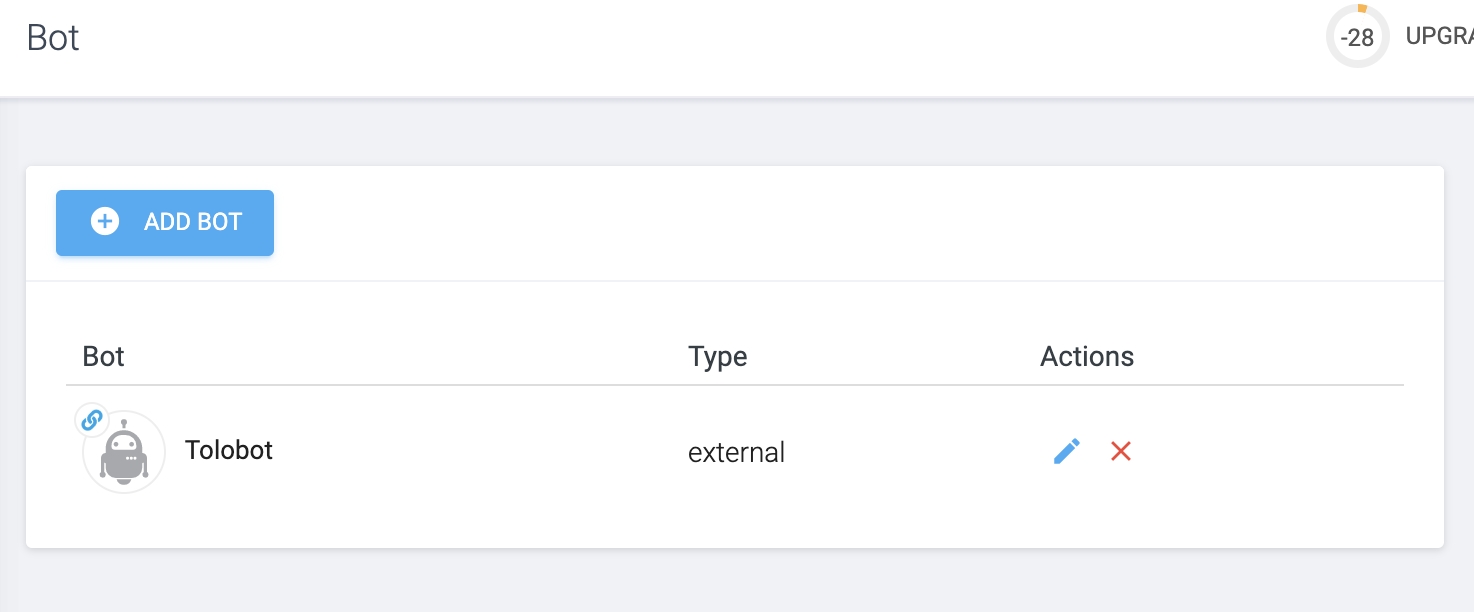
Click the CREATE BOT button. Tolobot is now available in our Bots summary list:
Now it's time to write some code to make our bot service functional.
Go back to the repl project. In the index.js file modify the /bot service, copying and pasting the following code:
const express = require('express');
const bodyParser = require('body-parser');
const { TiledeskChatbotClient } = require('@tiledesk/tiledesk-chatbot-client');

const app = express();
app.use(bodyParser.json());

app.post('/bot', (req, res) => {
  const tdclient =
    new TiledeskChatbotClient(
      {
        request: req,
        APIKEY: '__APIKEY__'
      });
  res.status(200).send({"success":true});
  let msg = {
    text: 'Cheers! You said: ' + tdclient.text
  }
  tdclient.sendMessage(msg);
});

app.listen(3000, () => {
  console.log('server started');
});
NOTE: just set APIKEY parameter to a generic string, as in the example. APIKEYs will be itroduced later in Tiledesk but Nodejs APIs already support them as a mandatory parameter.
To send messages to the current conversation (and to do other interesting stuff on the same conversation) we used TiledeskChatbotClient library, that we imported on top of the the index.js file:
const { TiledeskChatbotClient } =
  require('@tiledesk/tiledesk-chatbot-client');
Remember to import in the dependencies section of your package.json file as follows:
npm install @tiledesk/tiledesk-chatbot-clientYou can find the full code of this tutorial on the repl linked here:
https://replit.com/@tiledesk/tiledesk-helloworld-chatbot-tutorial
Configure a Route for the chatbot
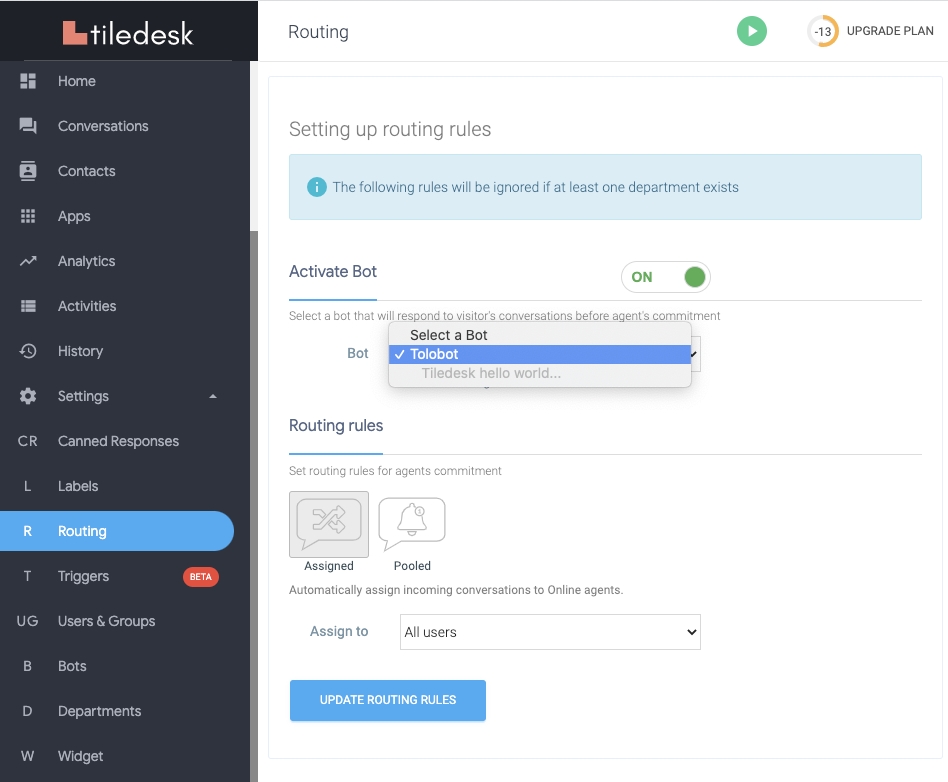
Now that our code is ok, we should configure a routing rule to make this chatbot available to our users. Select the Routing option and configure the corresponding rules as follows, activating the Bot, selecting Tolobot and marking the Bot only option for this routing, so Tolobot will be the only available Agent.
Live test
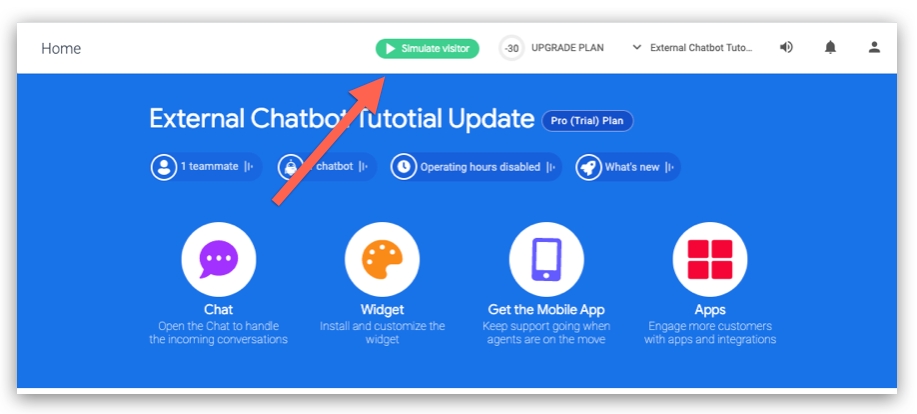
To test our chatbot press the green "Simulate visitor" button in the console's header, as shown in the following figure:
A new browser Tab will open with the widget working as if it is already installed on your website.
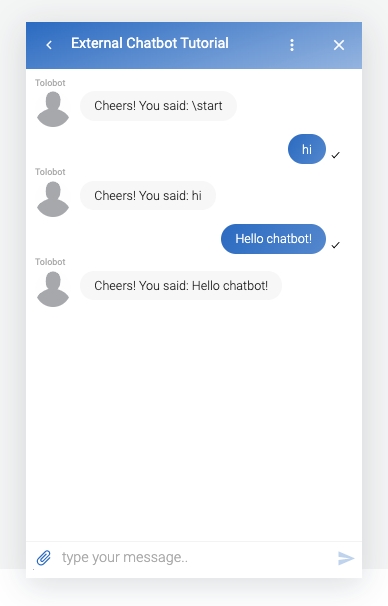
Press the New conversation button on the widget. A conversation will open on the default routing. A hidden \start message is sent to your bot who will reply echoing that message, as configured in the code. If you send new messages to the chatbot it will reply with a message echo, as in this example:
All the tutorial's source code is available on Github here
In the next tutorial you will learn how to interact with a Dialogflow agent directly from an external chatbot endpoint.
Do you have feedback on this article? Please send us your feedback writing an email to [email protected]
Last updated
Was this helpful?